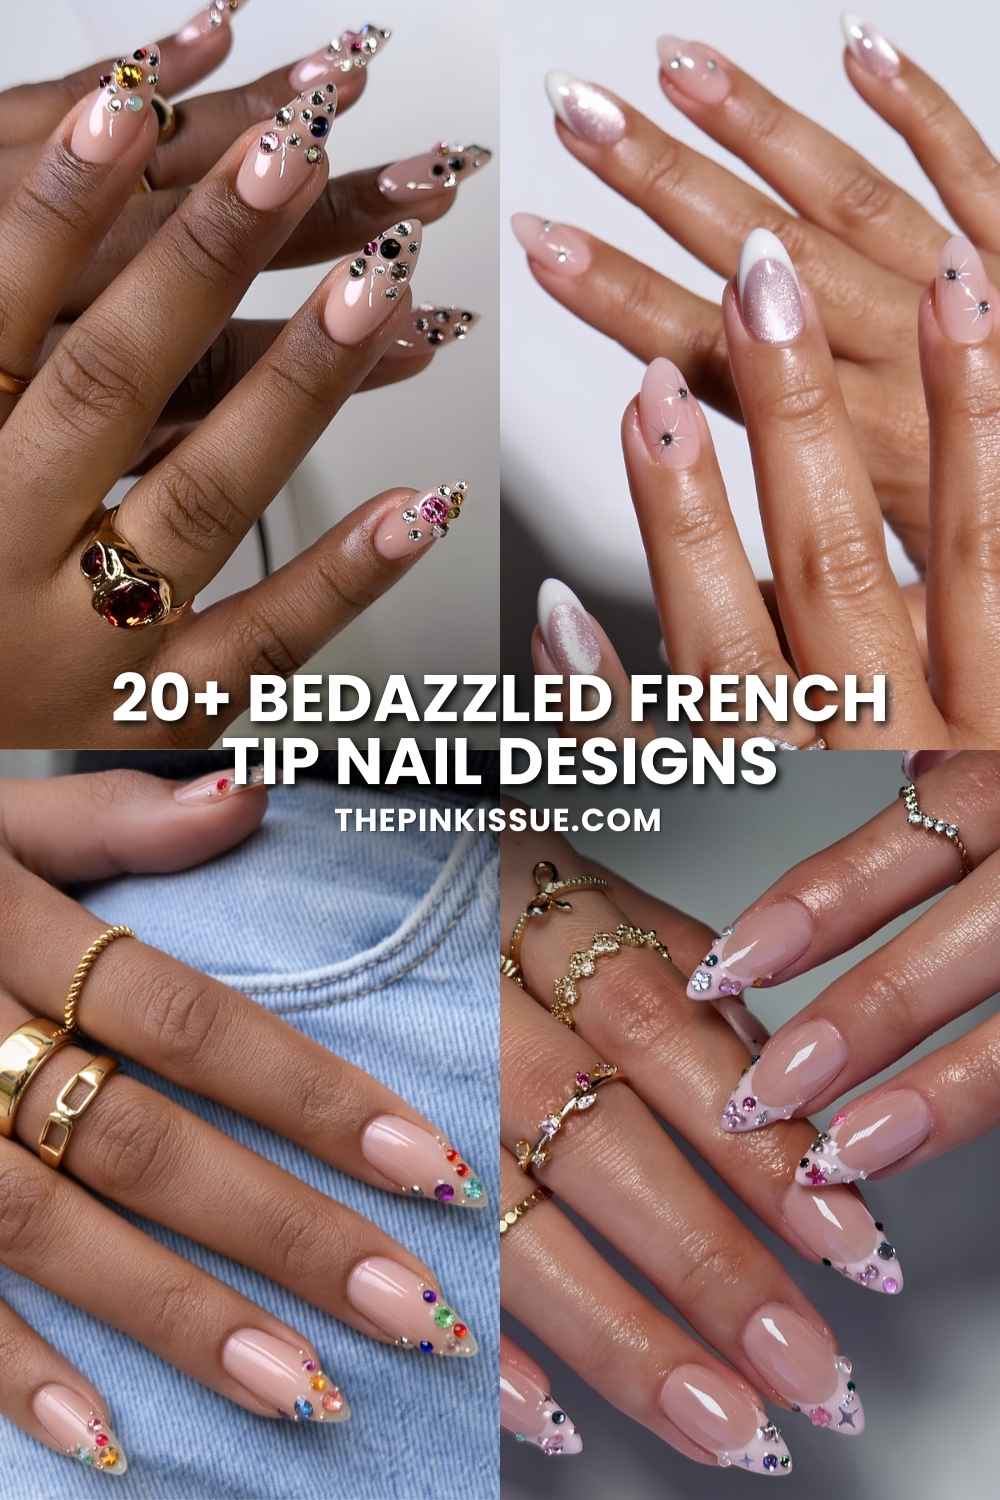
Look, we’ve all done the classic French a million times. It’s reliable, it’s pretty, it photographs well – but the second you add rhinestones, pearls, or microbeads? Suddenly you’ve got a mani that catches every light source within a five-mile radius and makes people actively stare at your hands. Which is the goal, obviously.

What makes blingy French tips so good is how much you can customize the sparkle level. You can go full Cynthia Erivo with chunky stones scattered across your entire nail bed, or keep it minimal with a single row of gems tracing your smile line. The French tip base does all the heavy lifting to keep things polished while the embellishments bring the personality.

Below, we’re breaking down what’s actually trending right now, plus over 20 inspo pics to screenshot before your next salon appointment.
How to wear bedazzled French tips
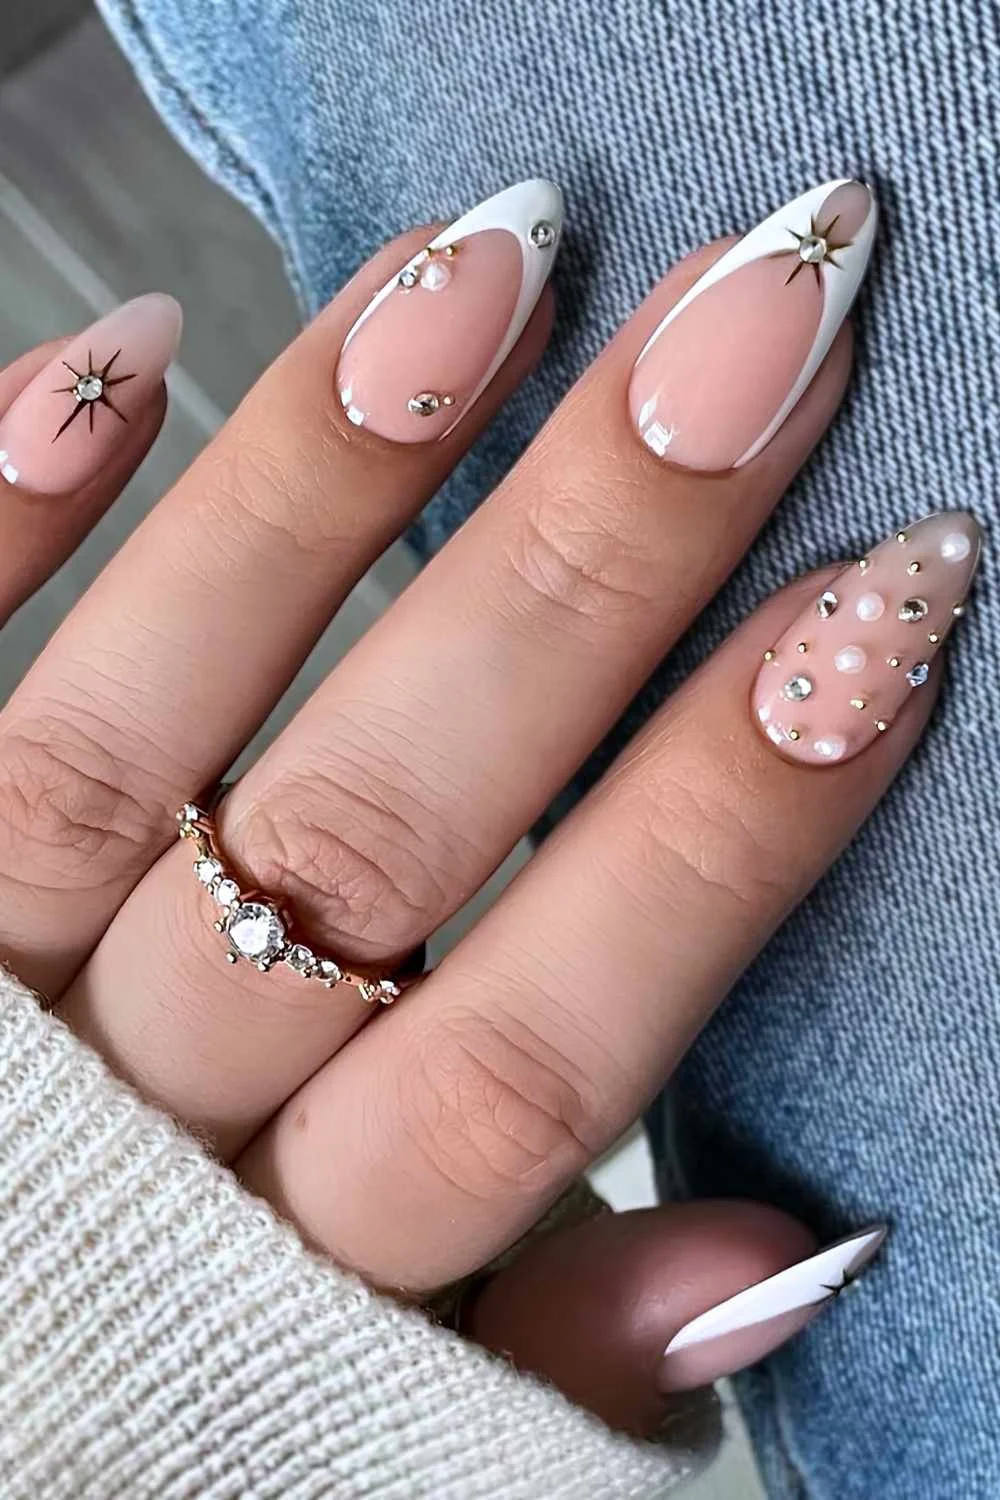
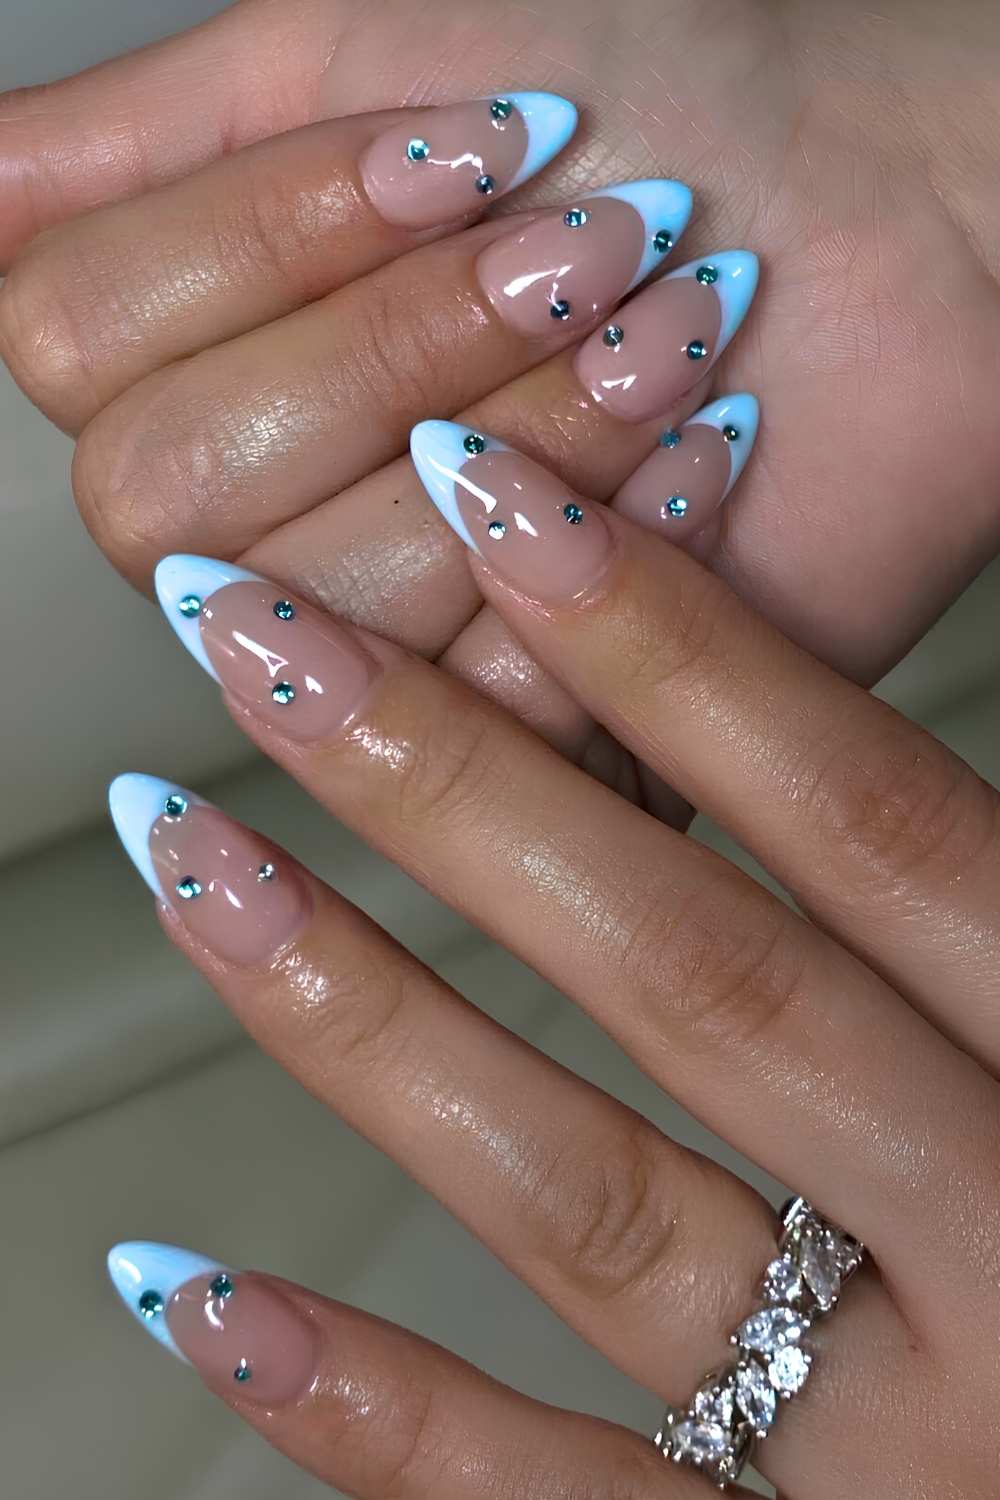
The nail crown technique is having a moment – crystals placed specifically along the free edge of your nail like tiny tiaras for your fingertips.


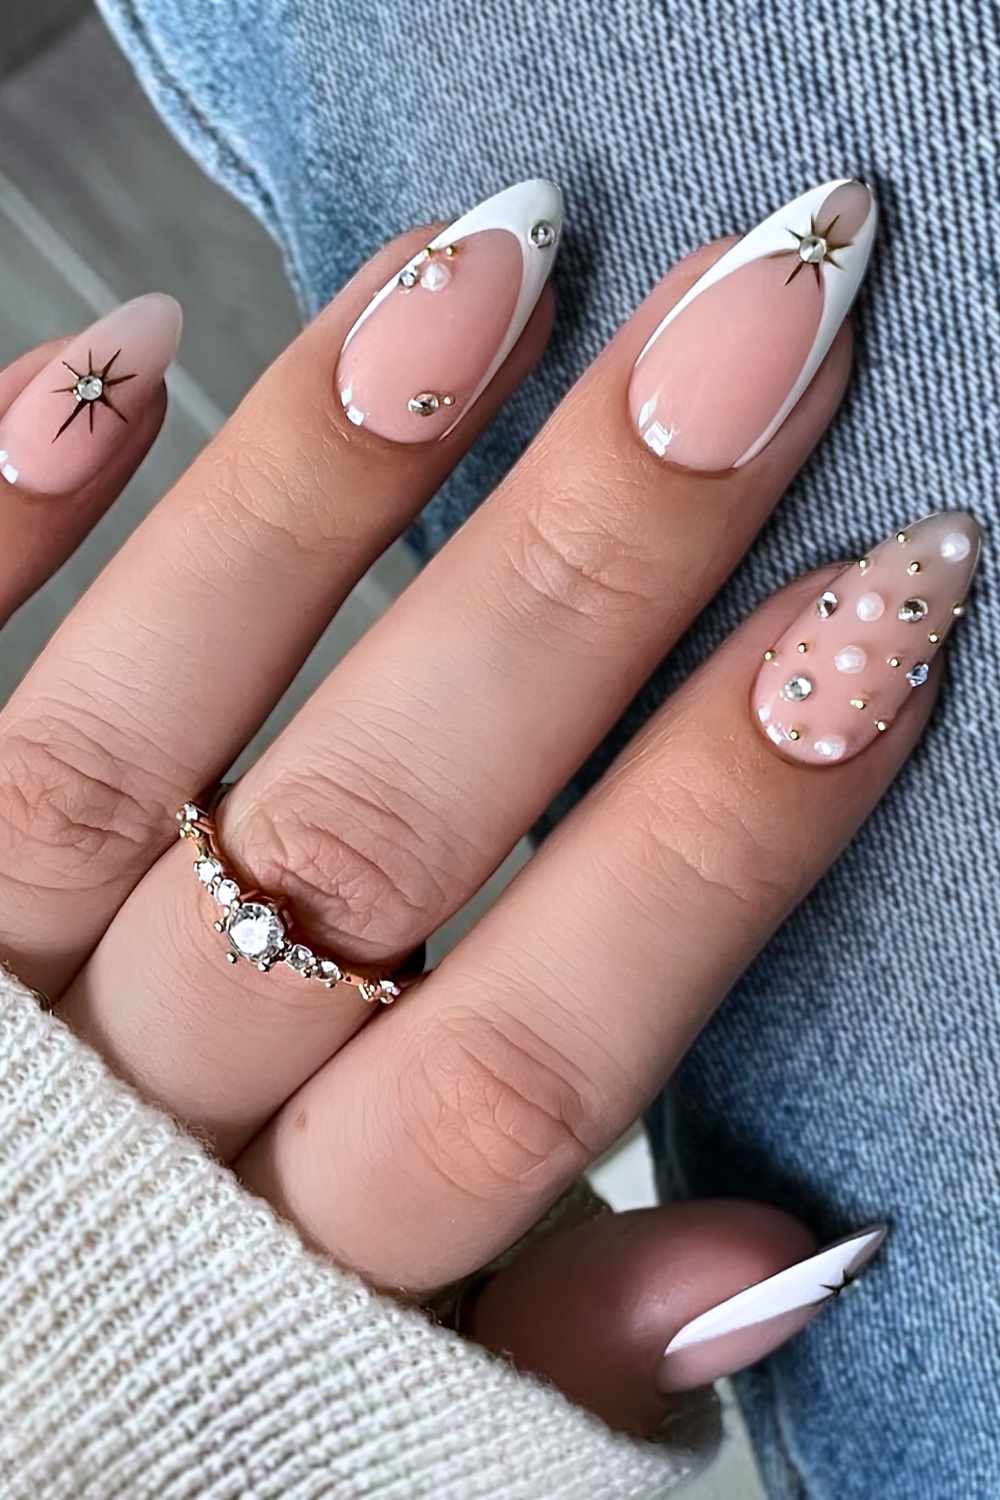
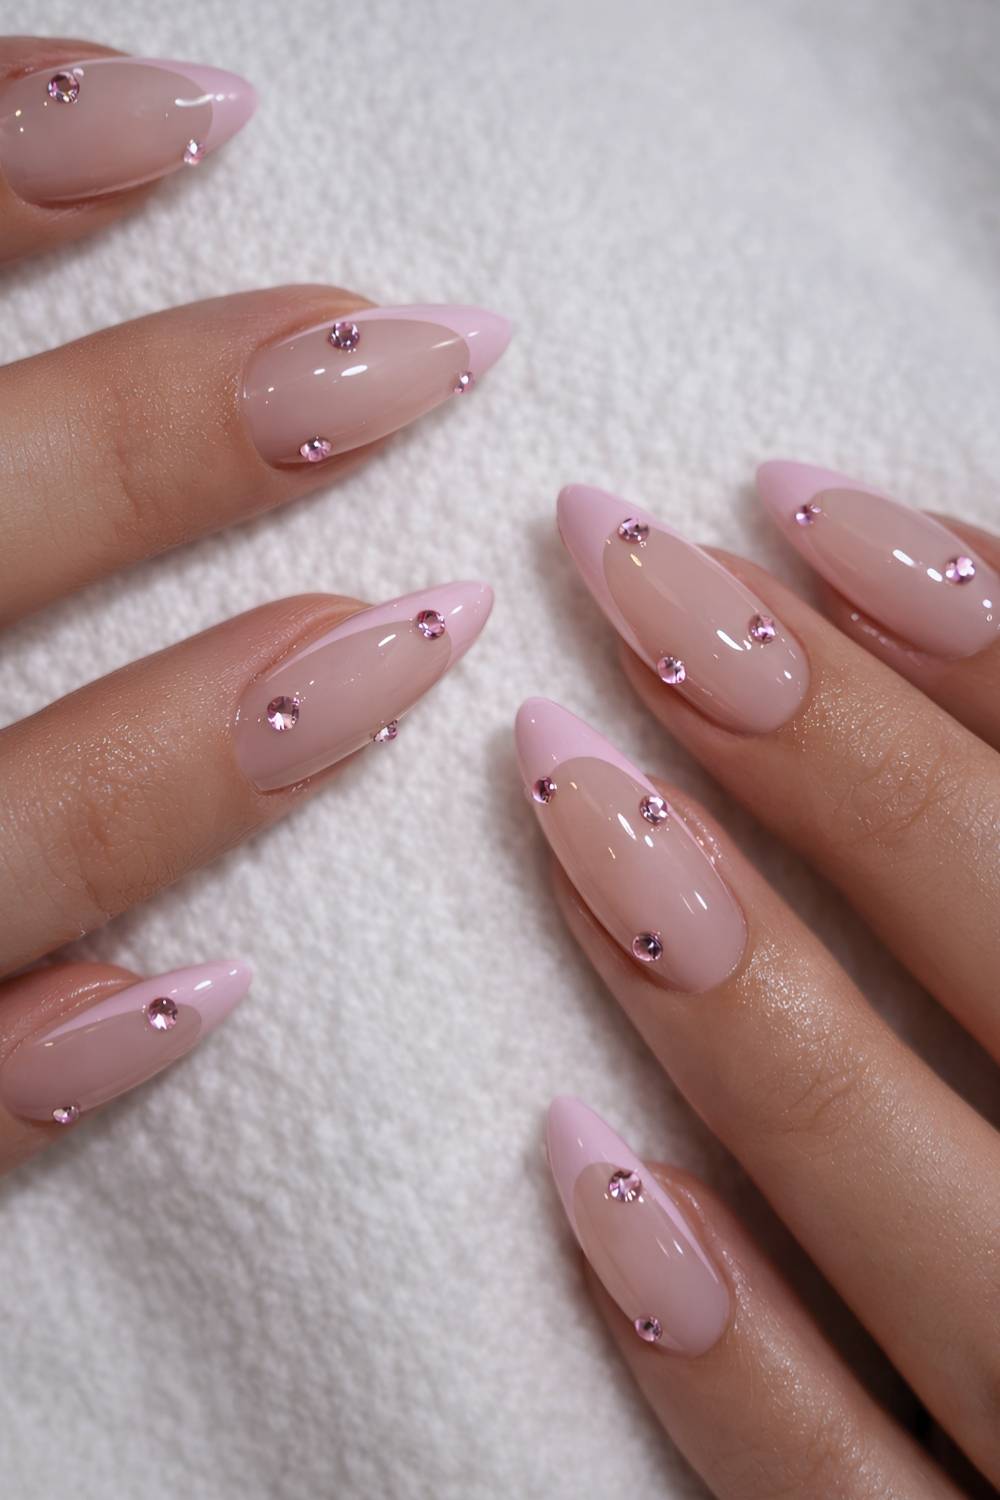
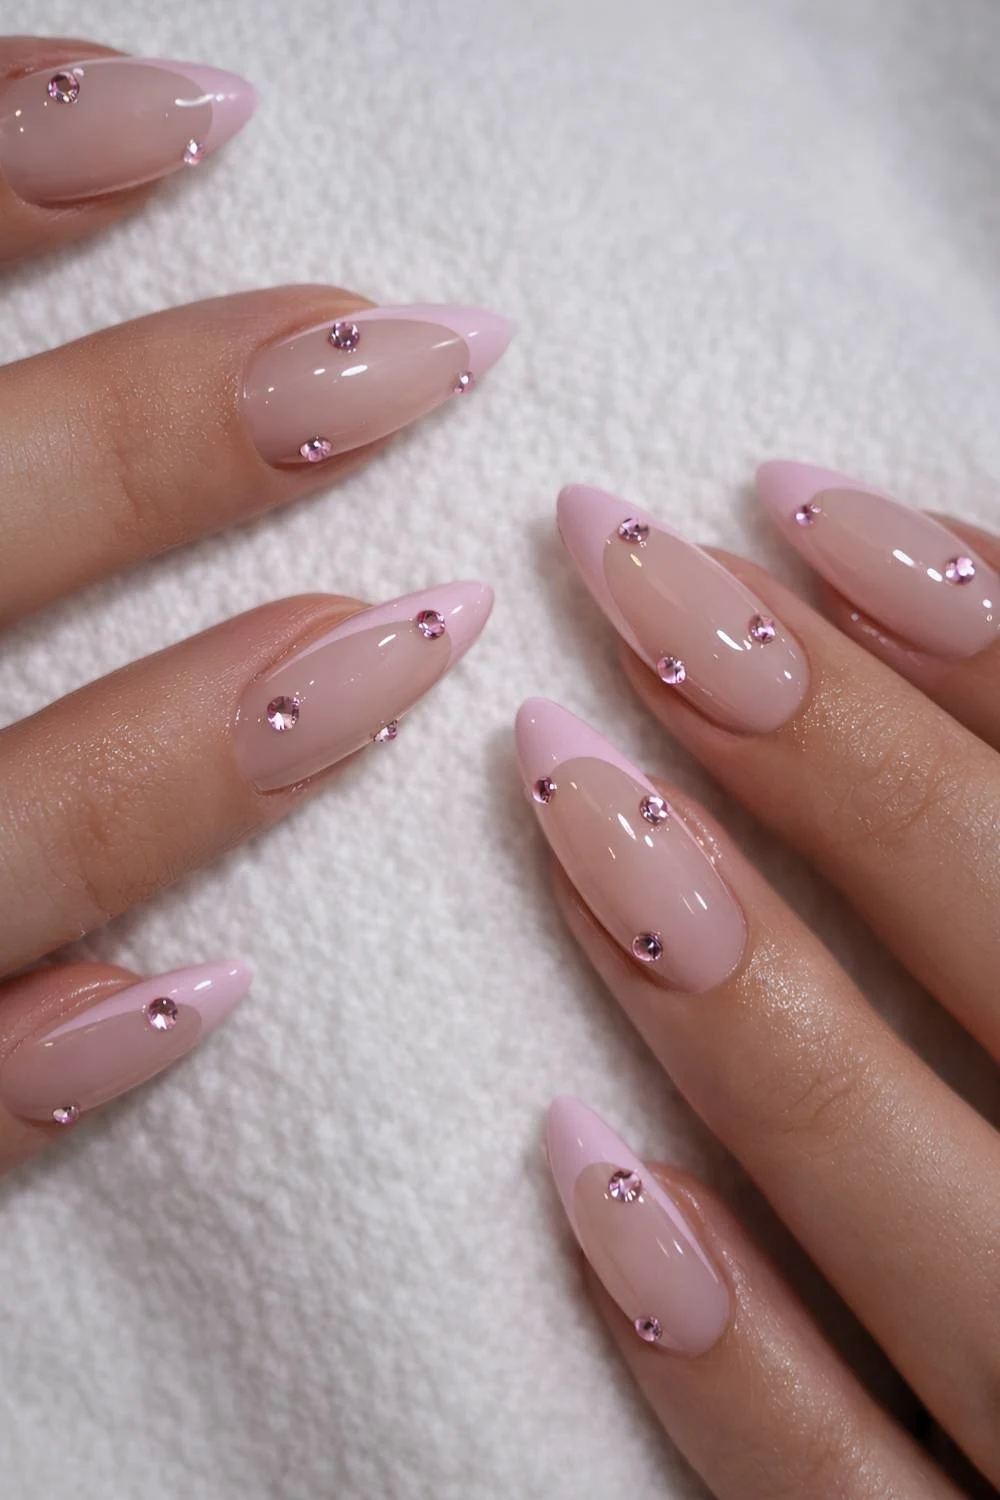
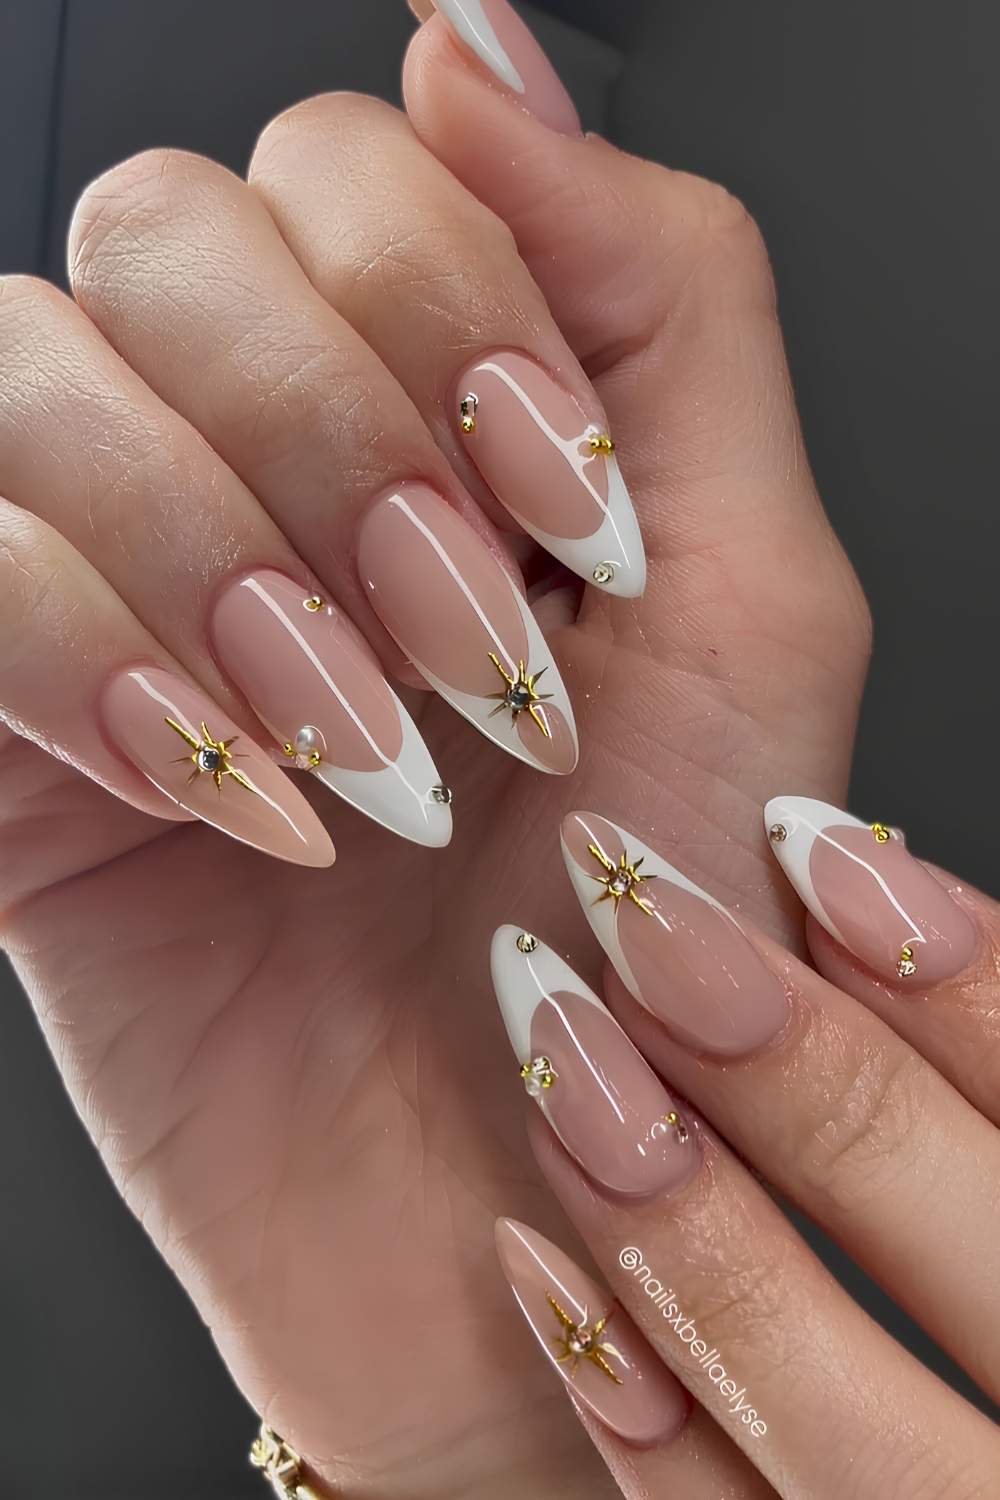
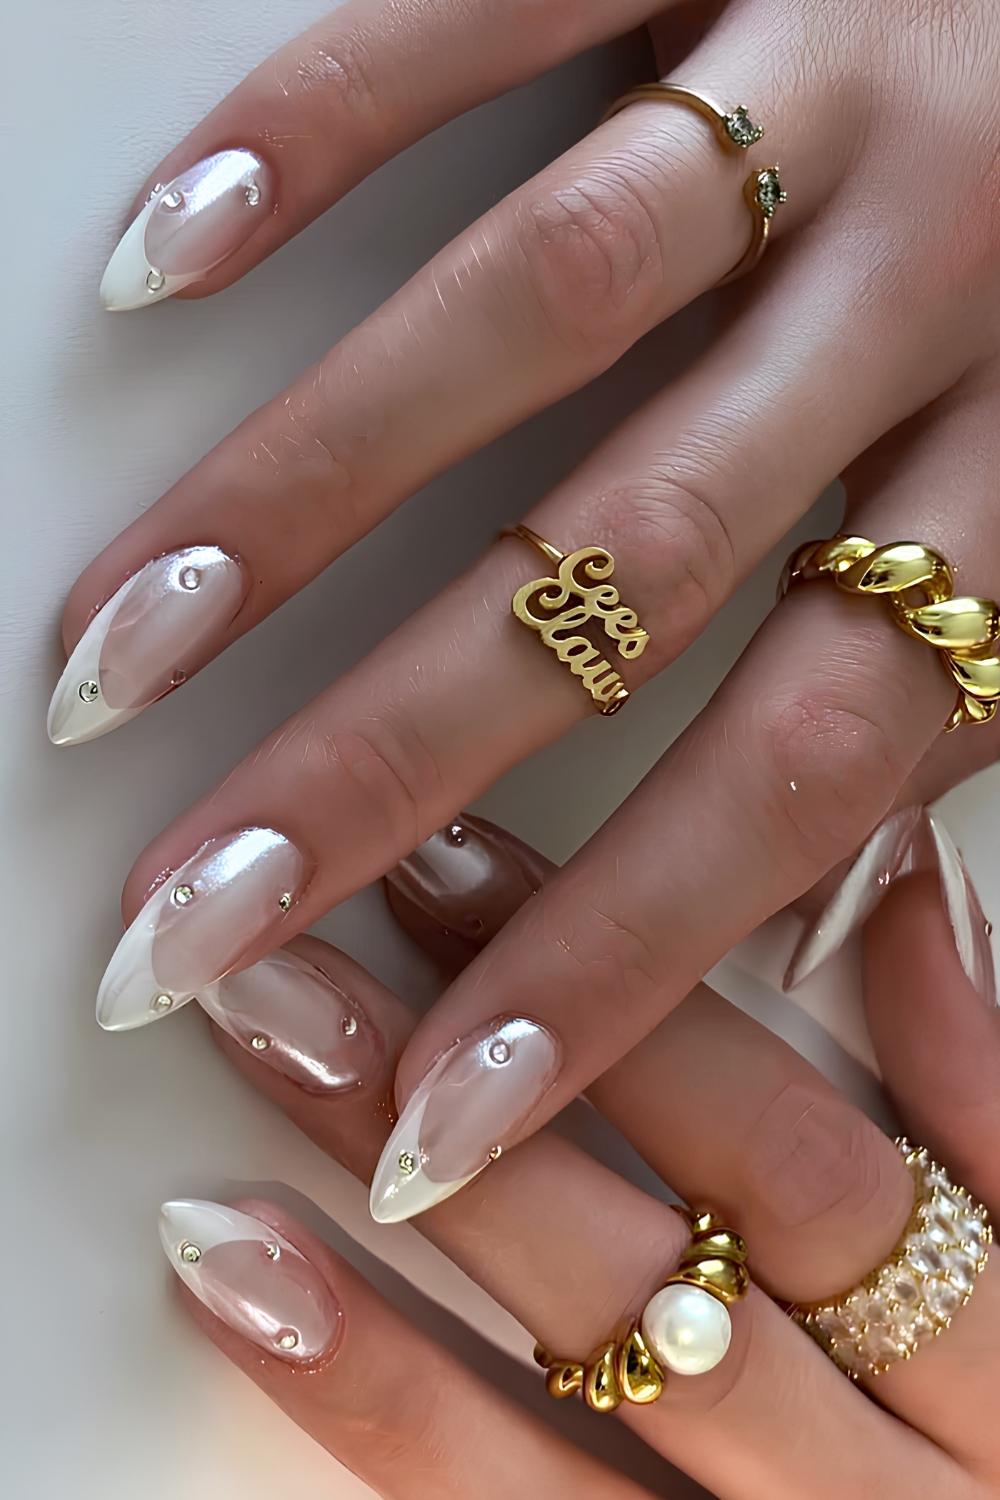
Crystal-encapsulated tips are everywhere too, where gems sit directly on the painted smile line itself so the tip becomes this glittering border. Your French isn’t just painted anymore, it’s encrusted.

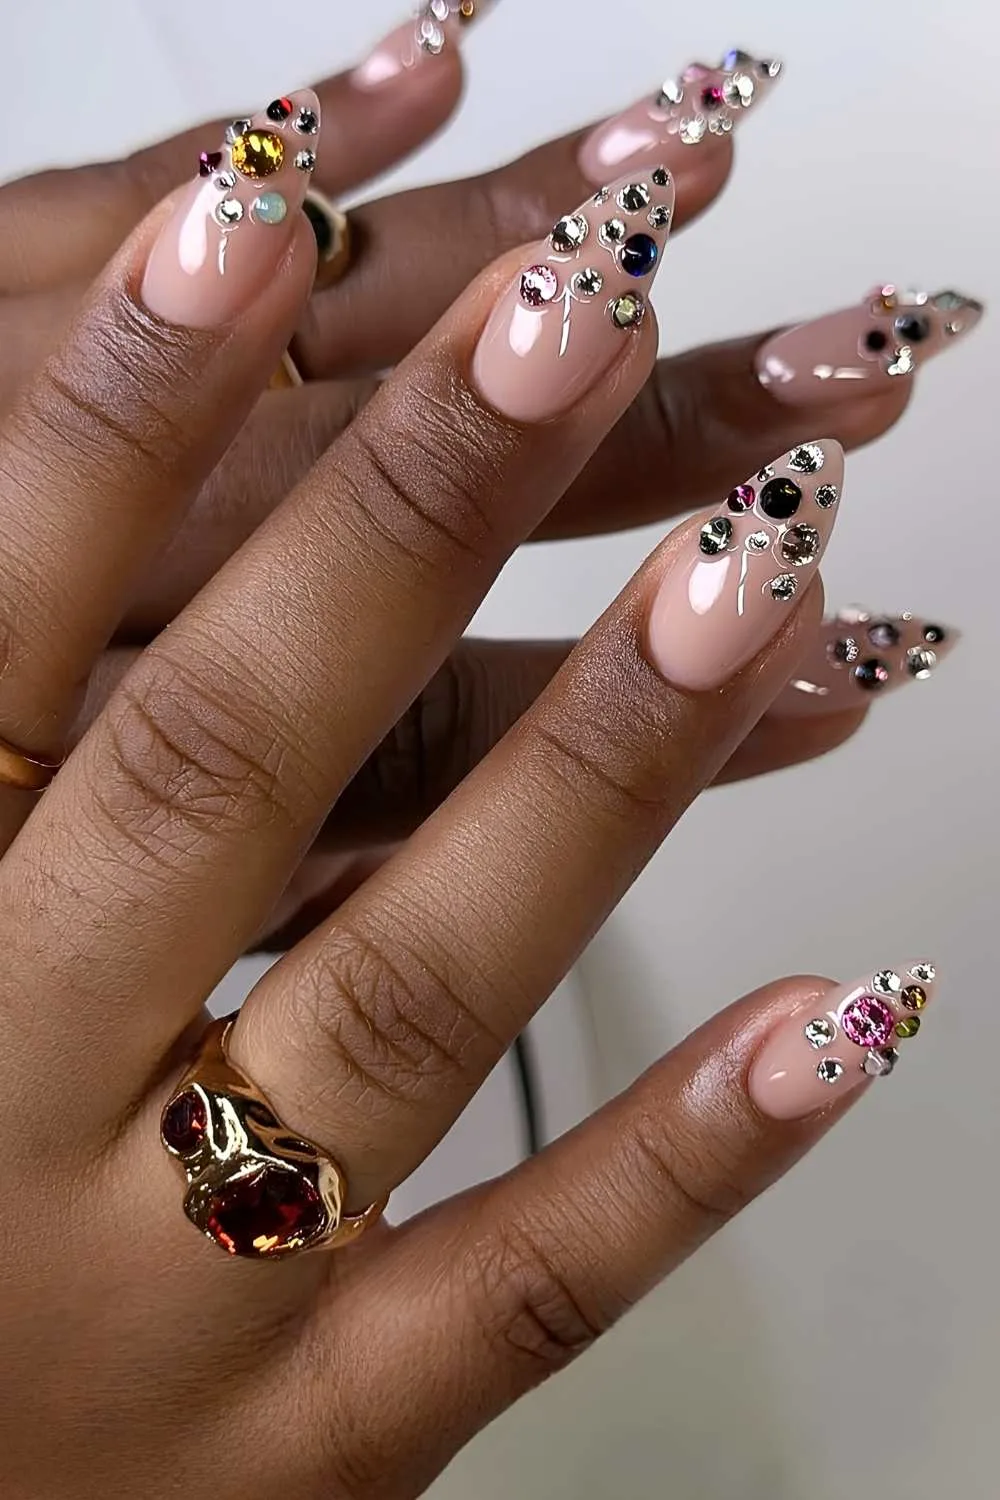
Gradient crystal placement is for the girlies who want drama without committing to full coverage. Nail techs are arranging stones in cascading patterns – dense sparkle at the tip fading to sparse gems toward the nail bed for that ombre crystal effect.

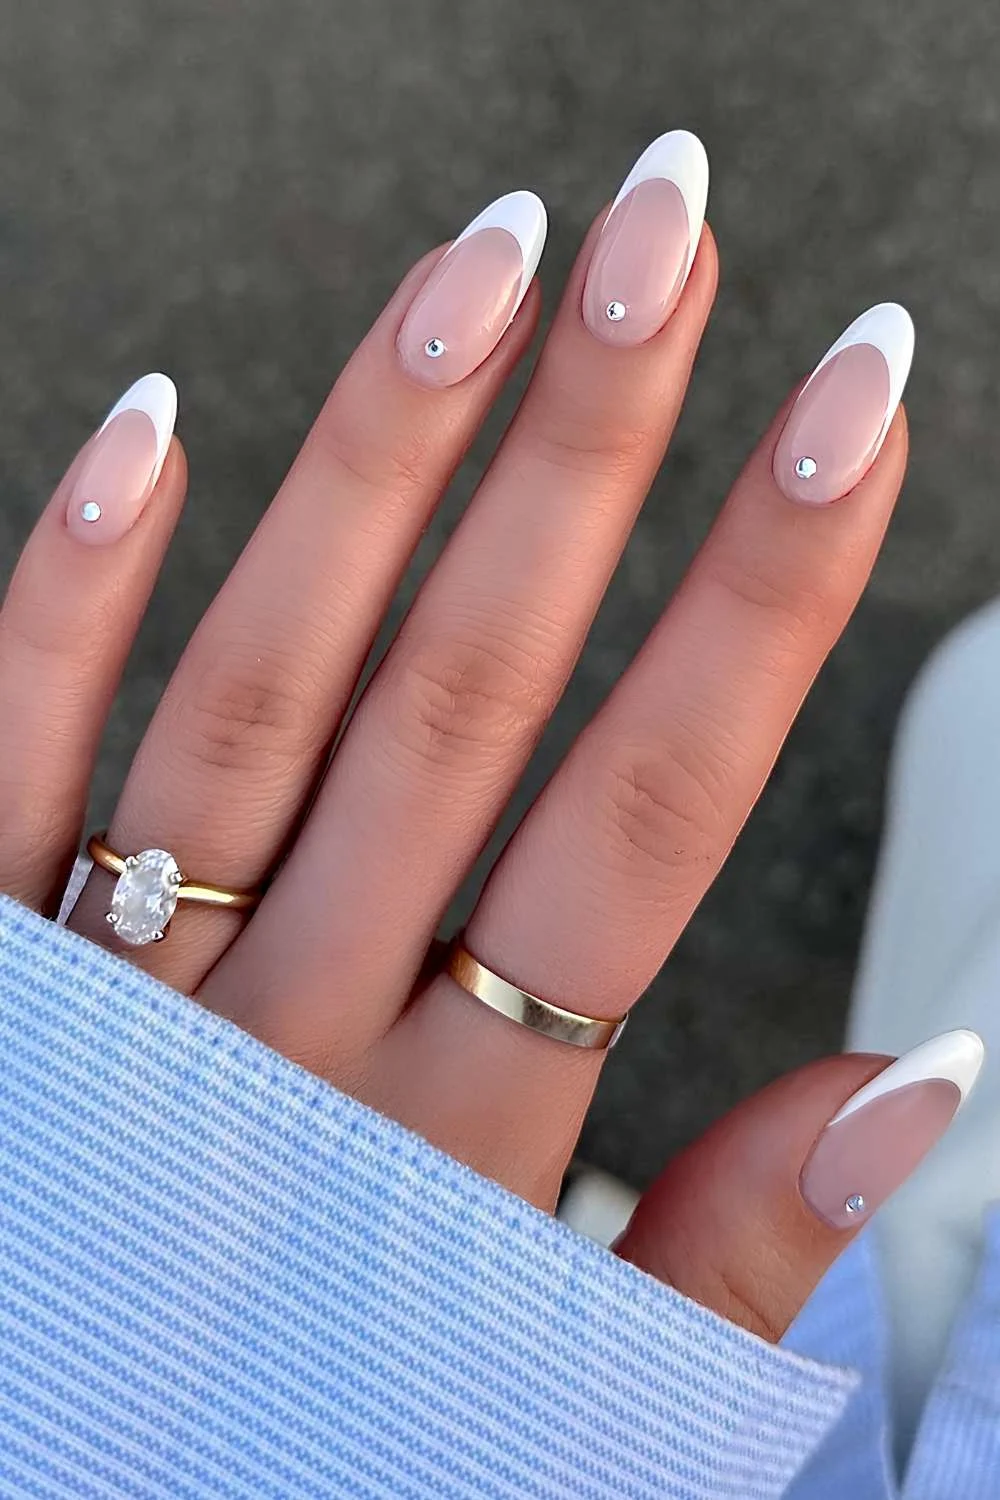
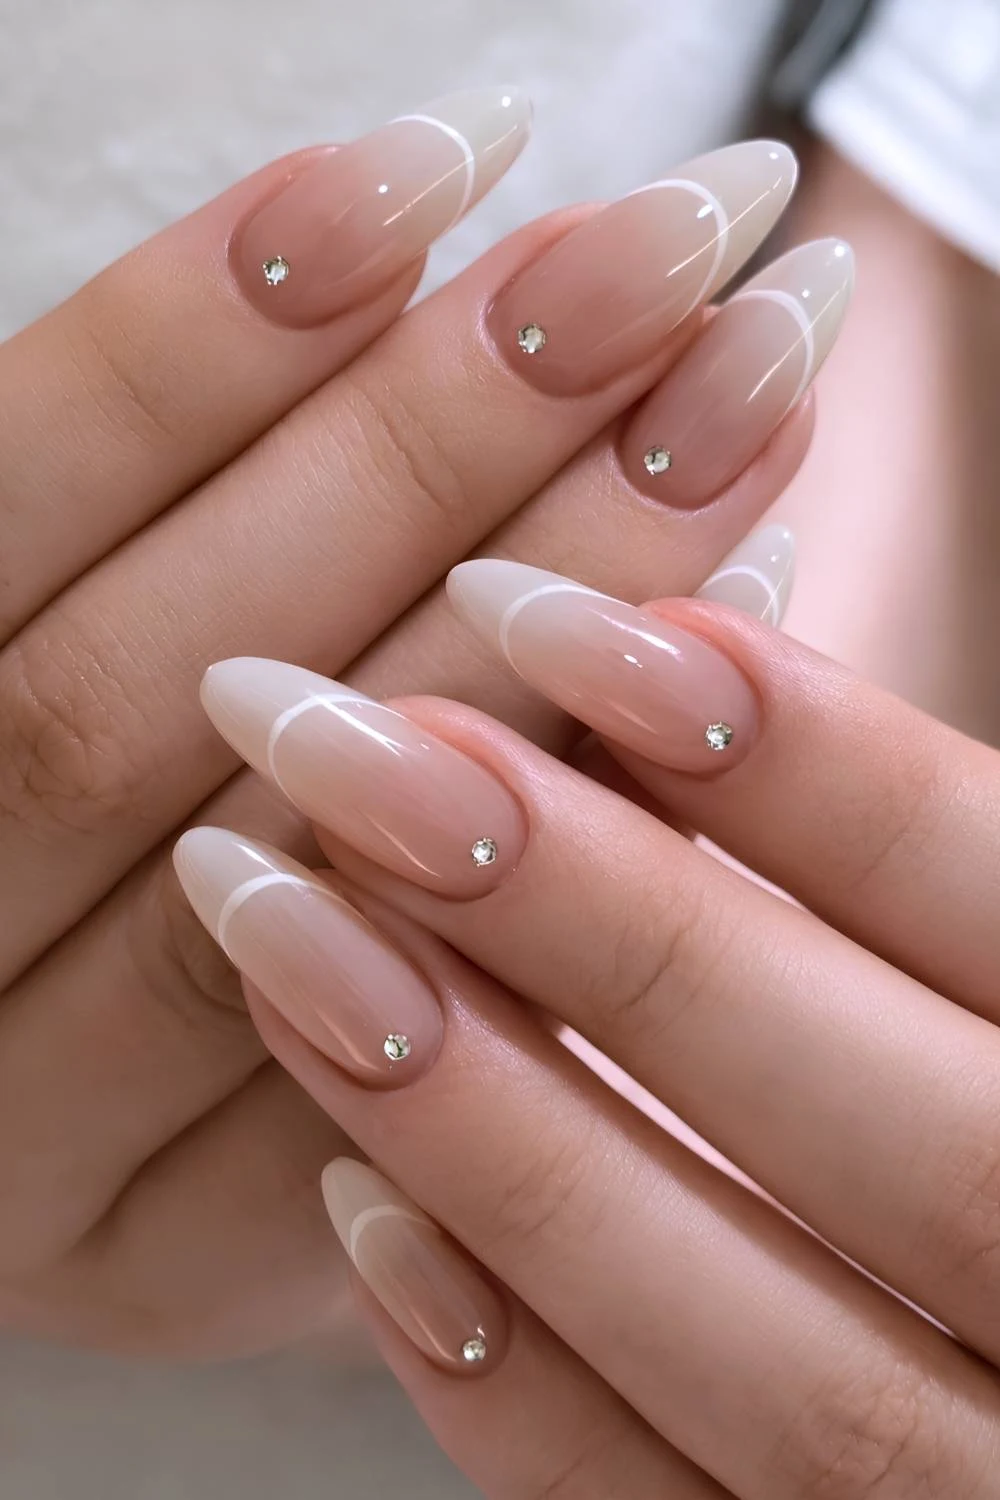
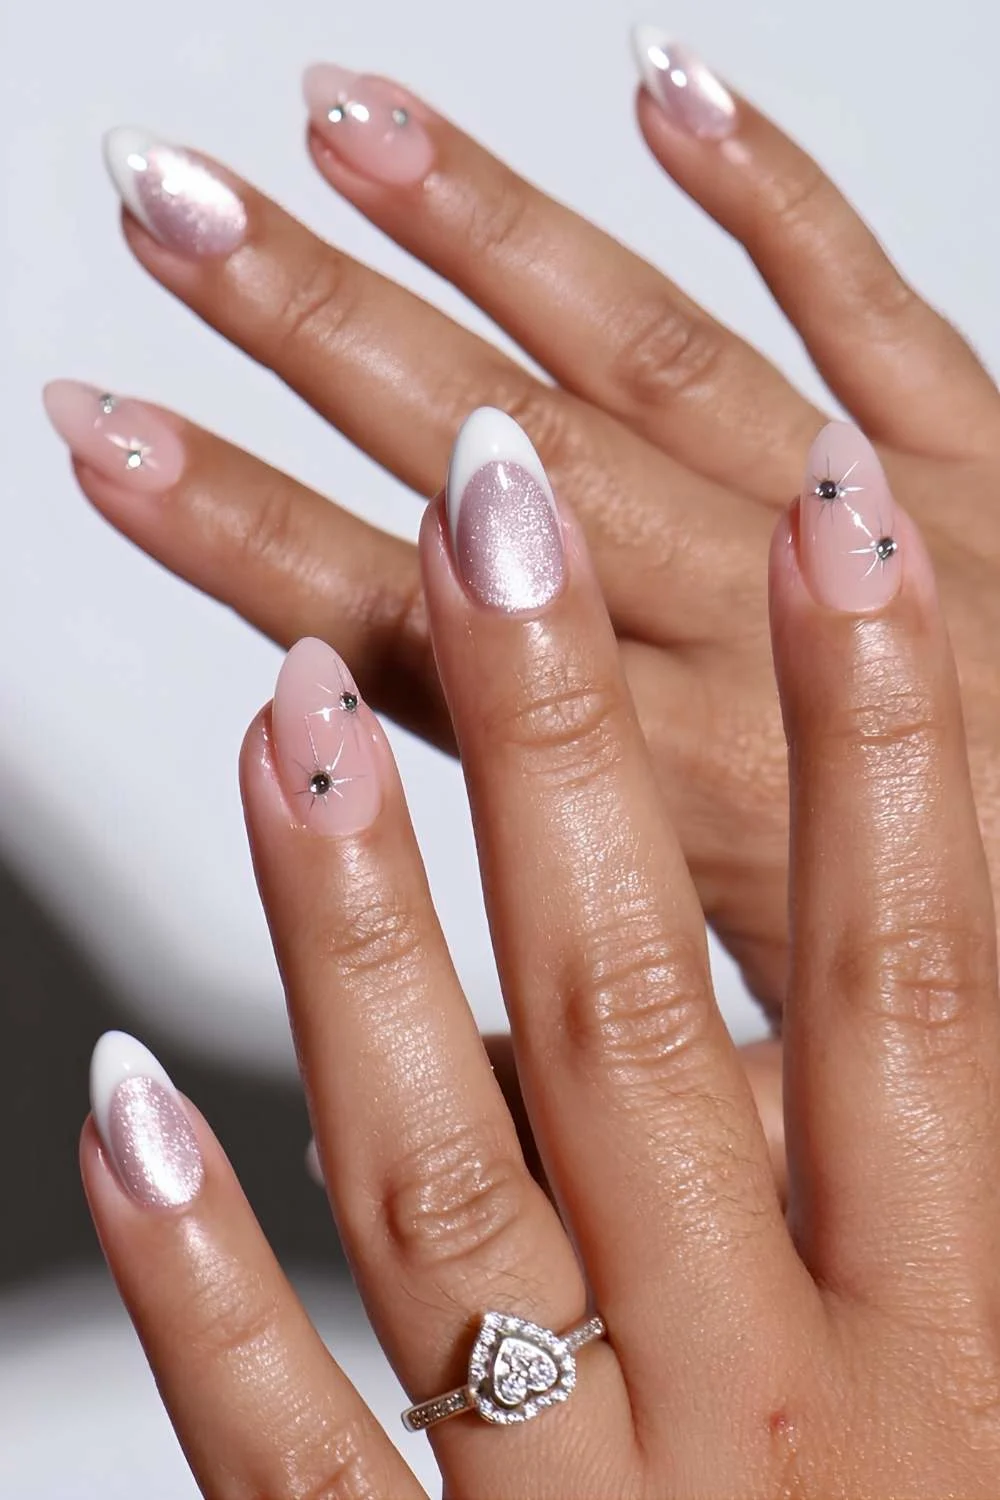
If you want something more understated, micro pearls or tiny crystals outlining just the edge of a classic white tip upgrades the whole look without screaming for attention. Cuticle gems are another minimalist move – just add a single rhinestone or pearl to each cuticle and call it a day.
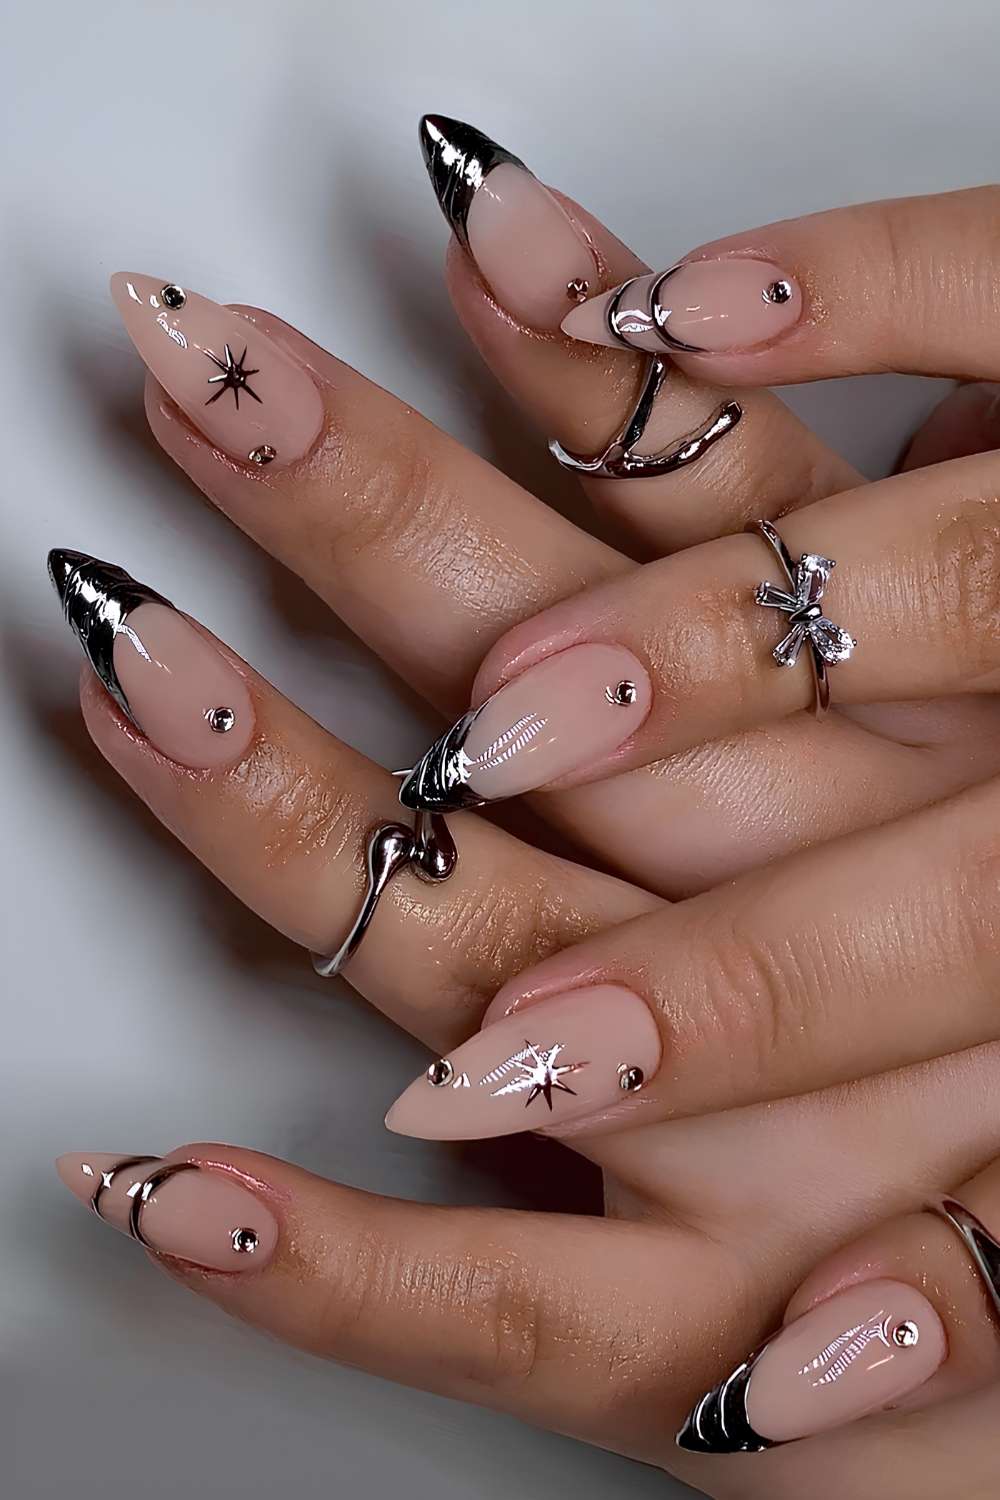

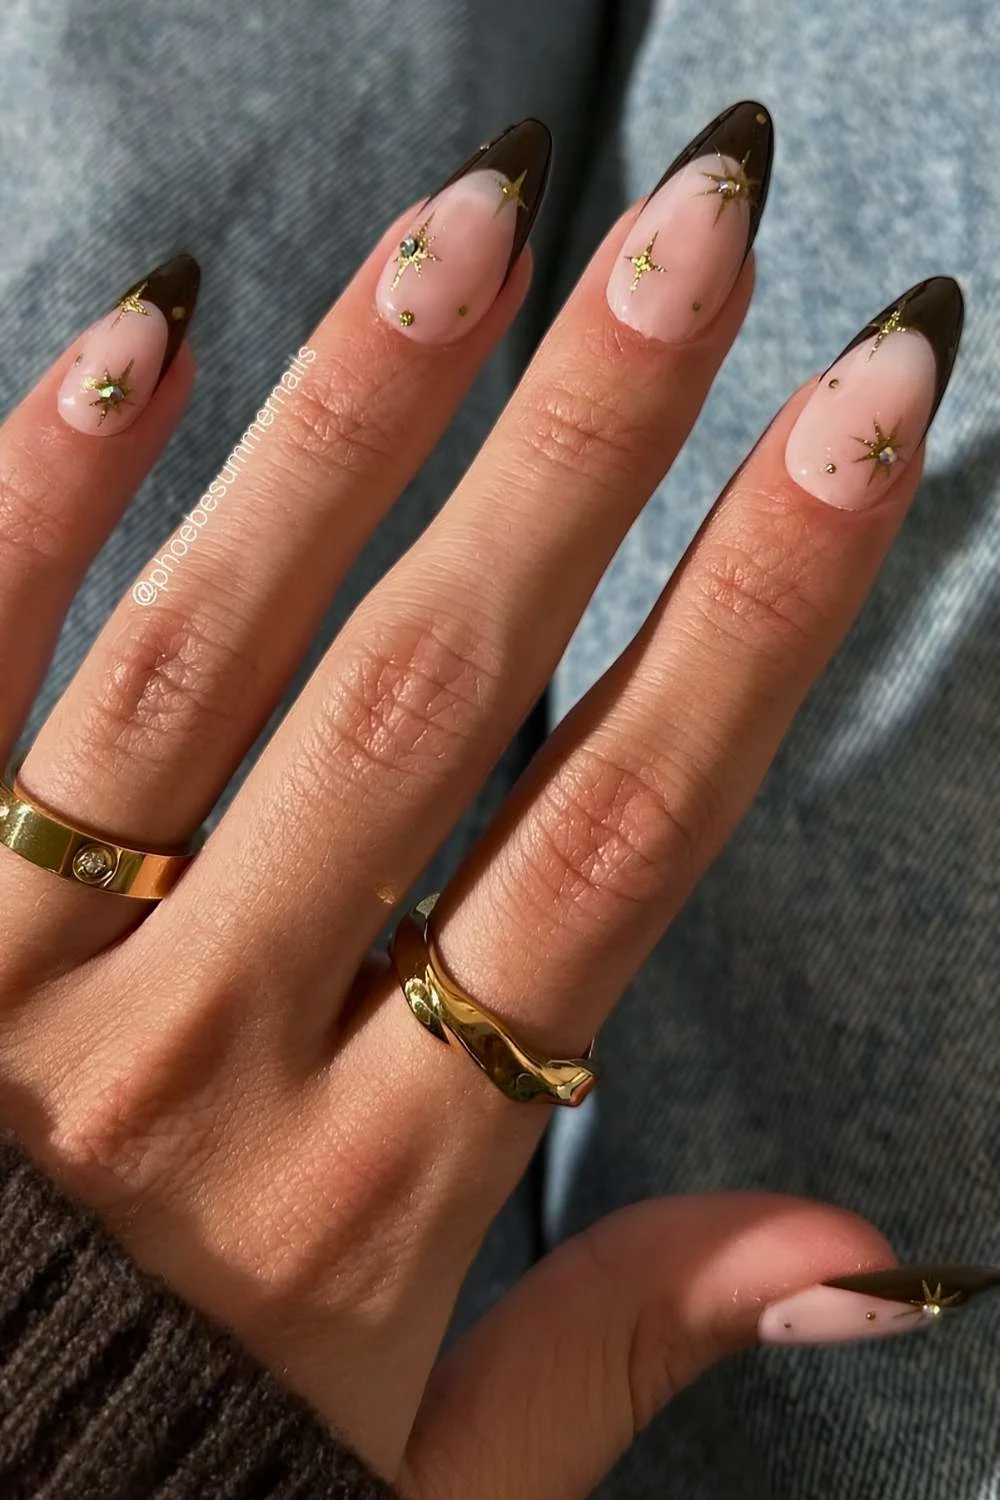
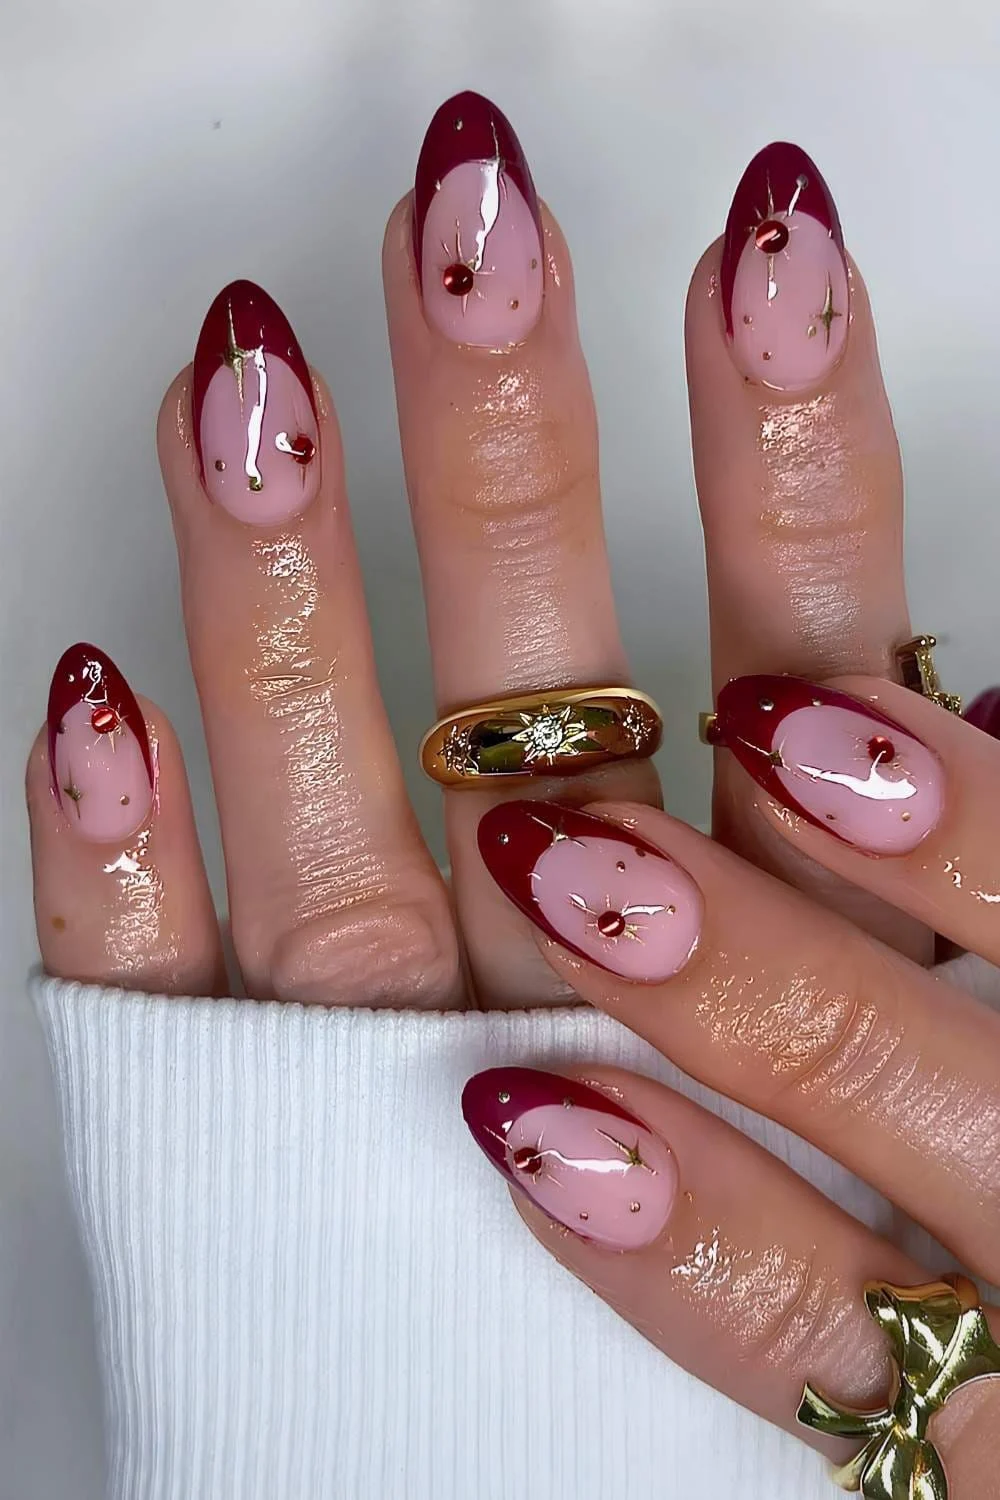
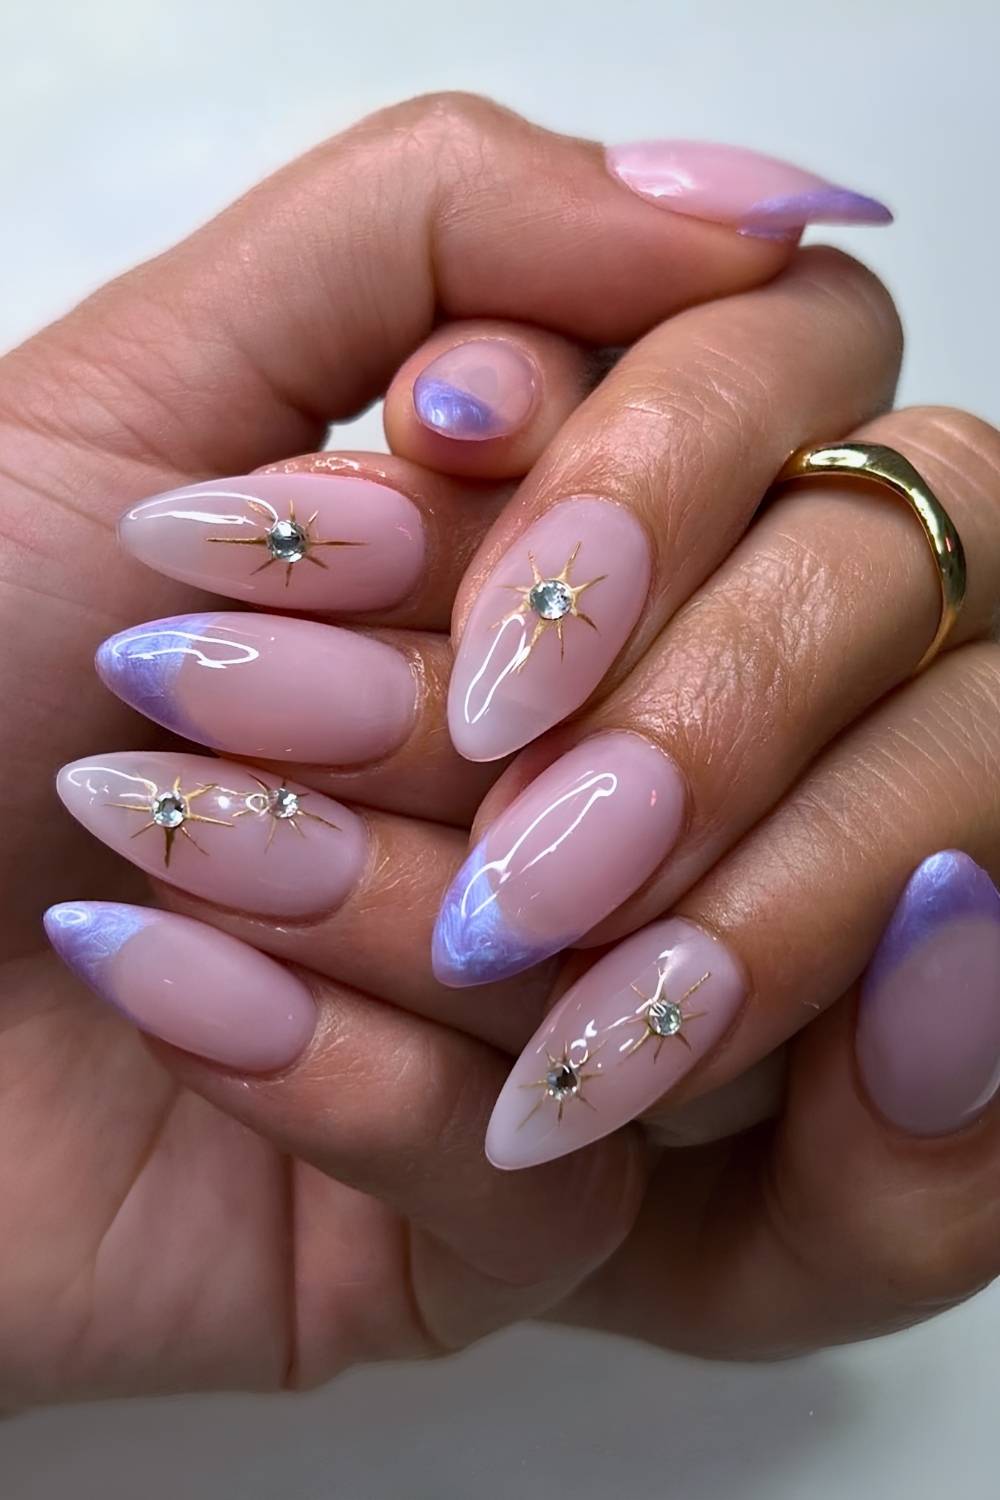
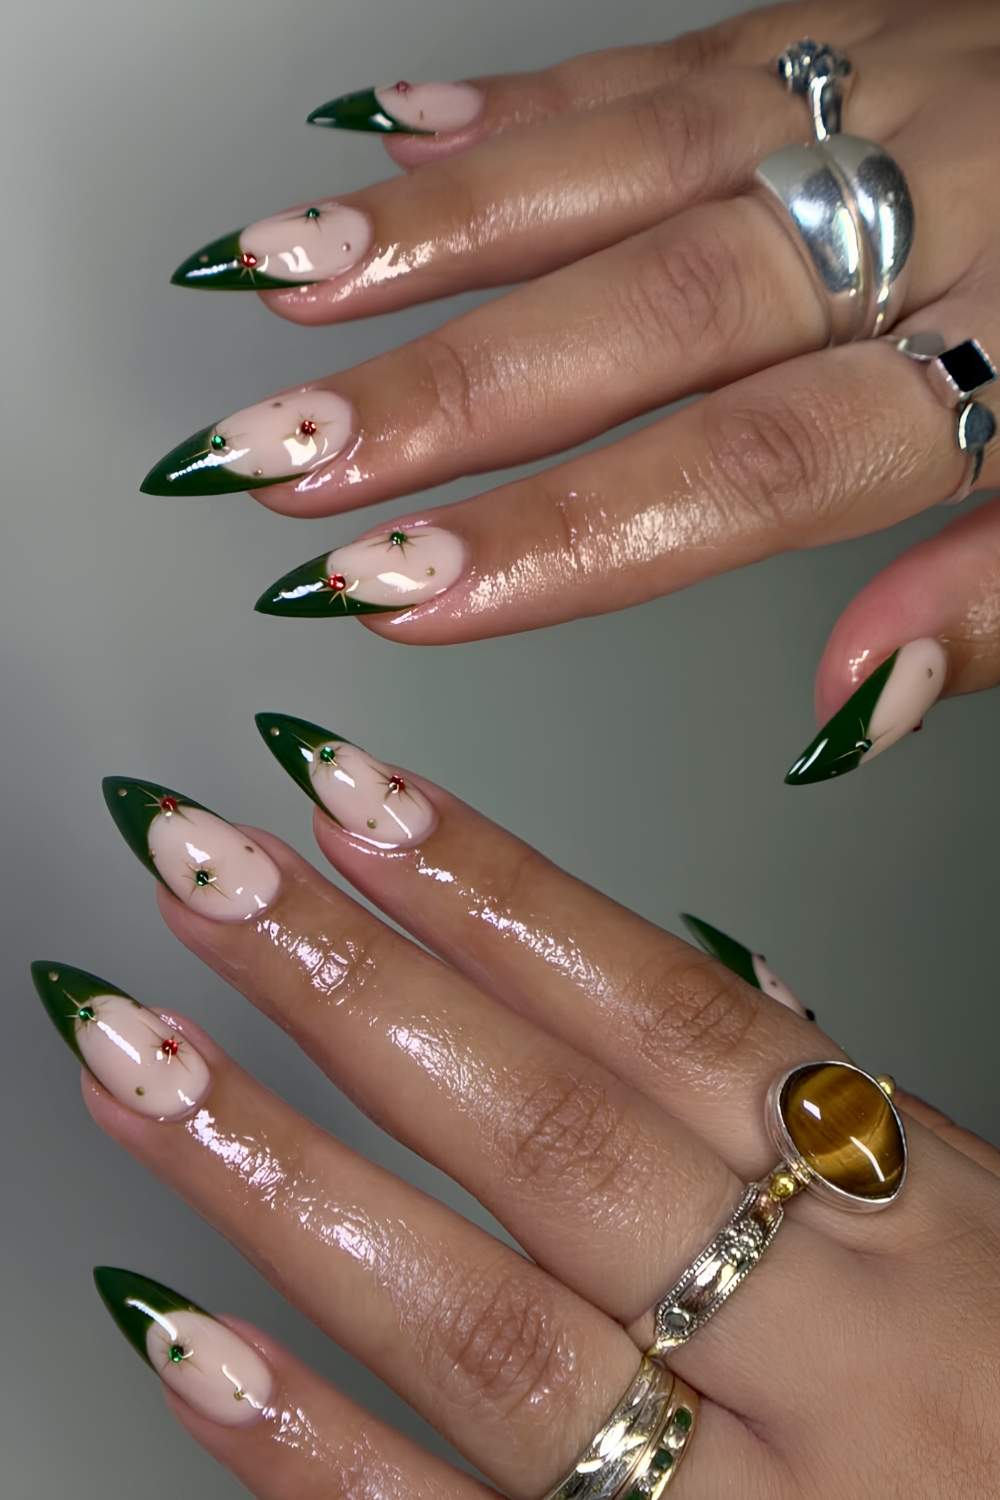
The celestial art moment is huge right now too. Metallic gold or silver stars with rhinestone centers scattered across are giving starry-sky, especially paired with darker colors. But this look has completely crossed over into brights and pastels too, so you can’t go wrong.
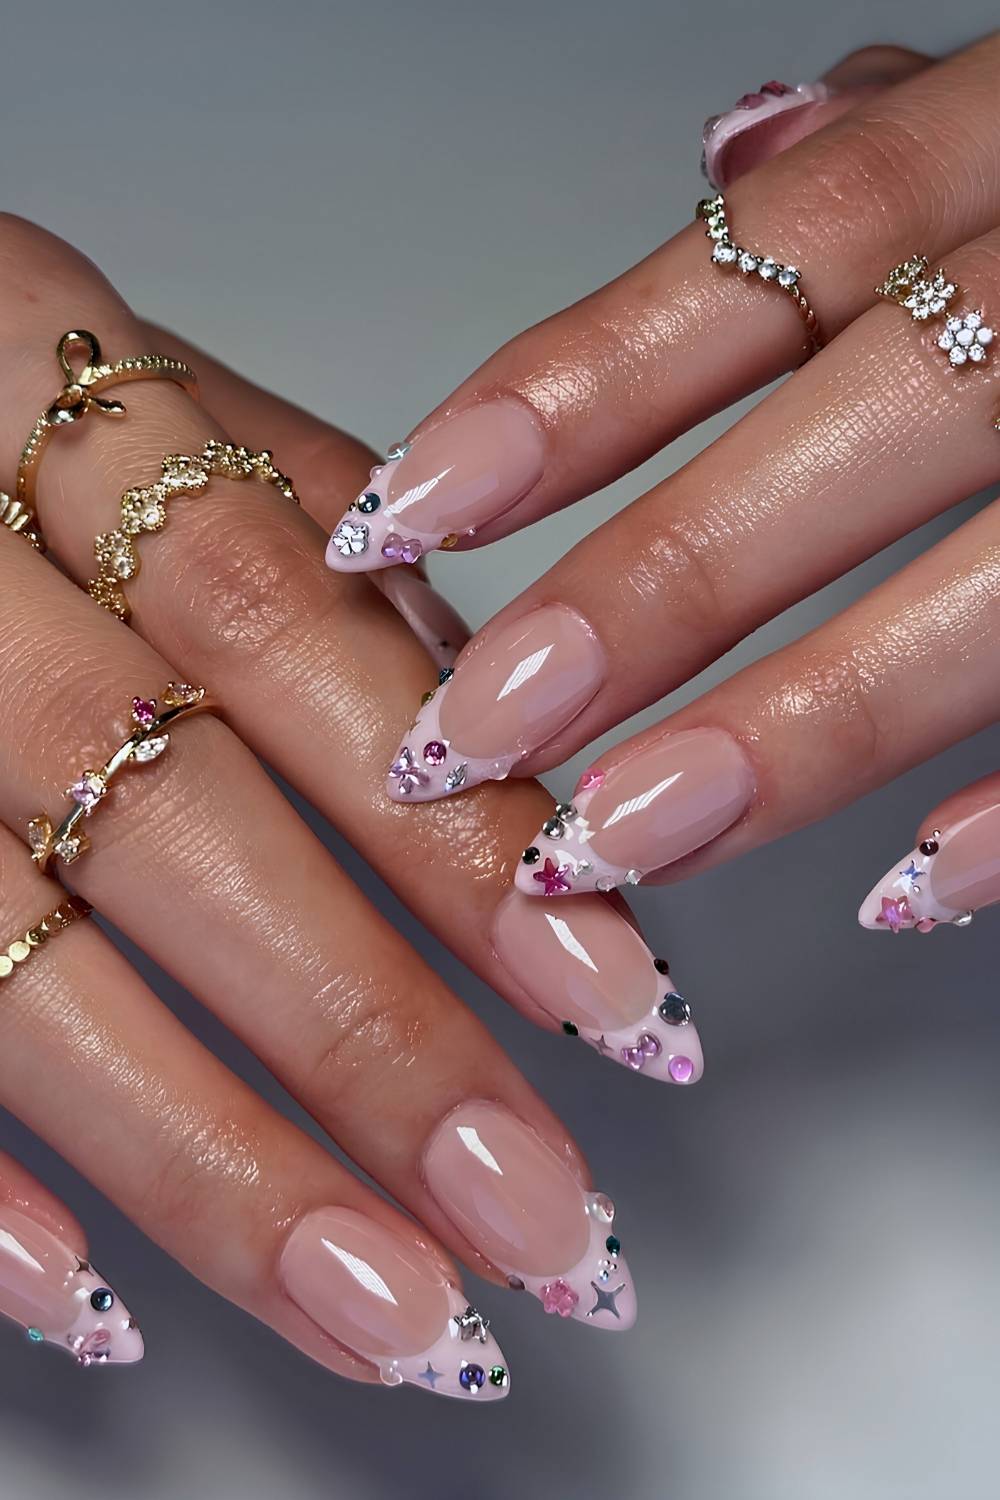

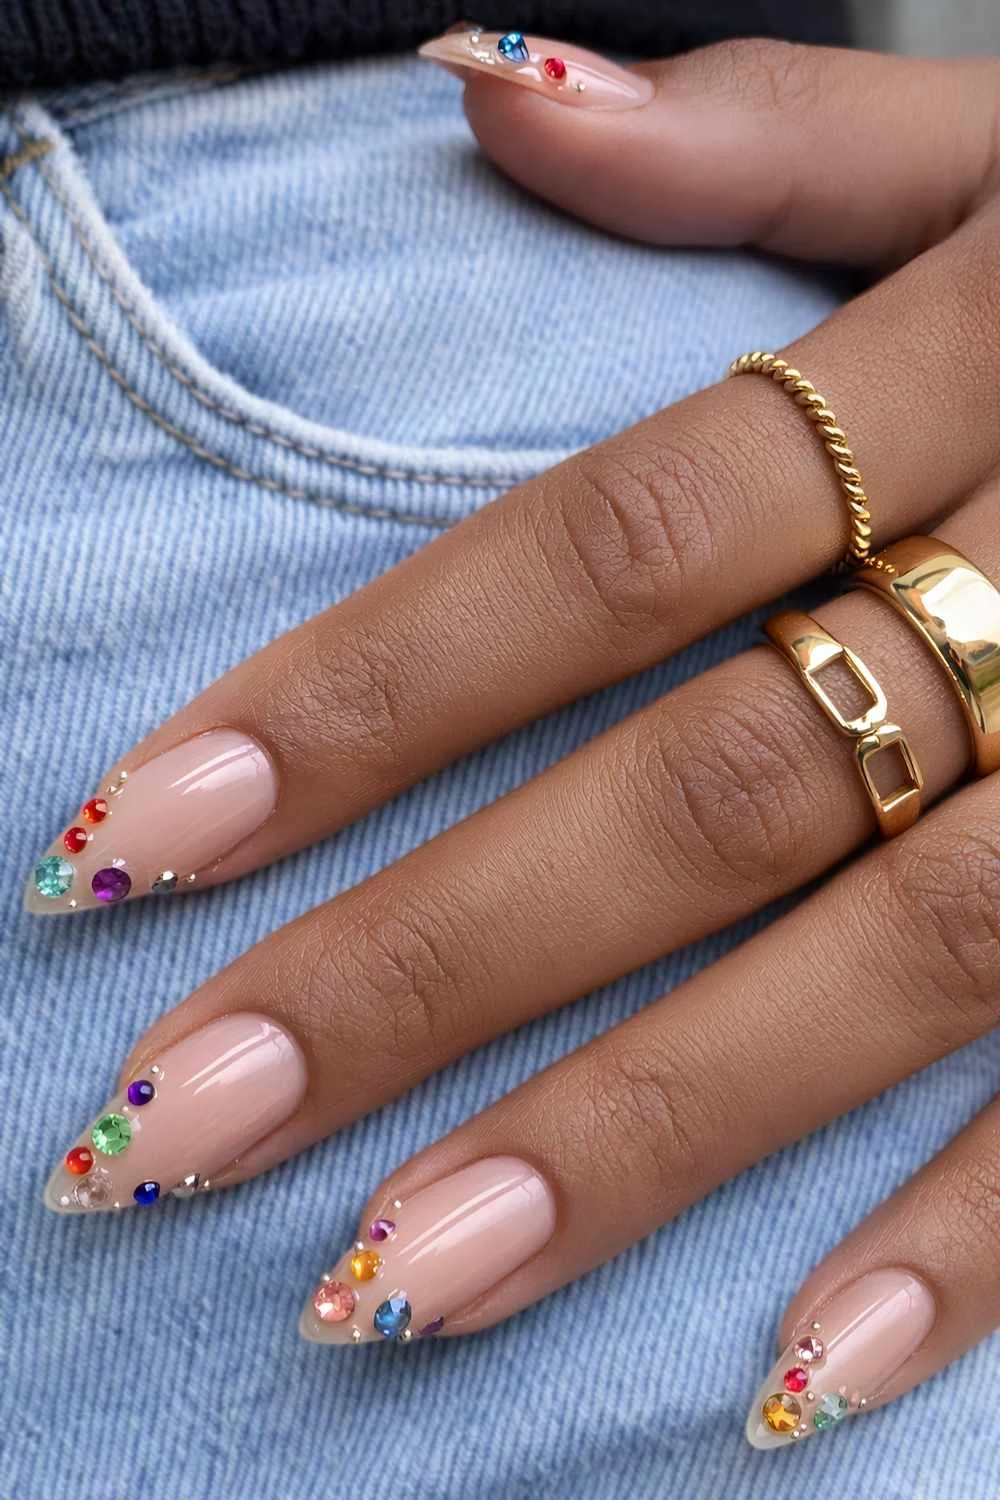
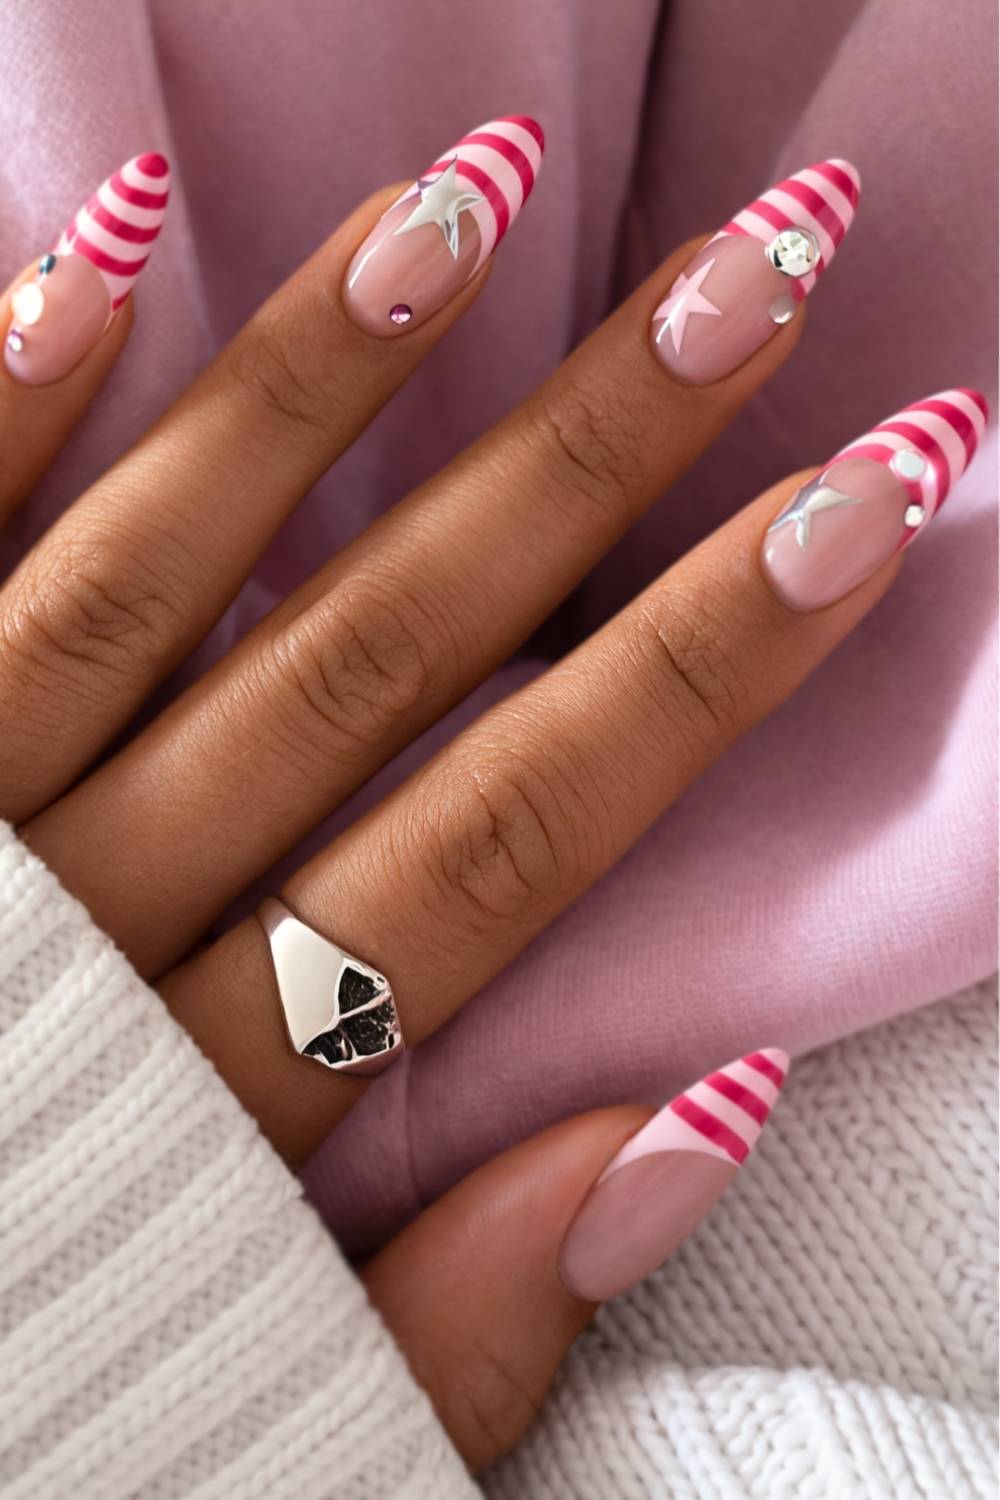
Y2K girlies are going hard on shaped crystals – hearts, stars, butterflies, all in candy colors against jelly or milky bases. It’s giving early 2000s nail magazine but with better quality stones and application techniques.
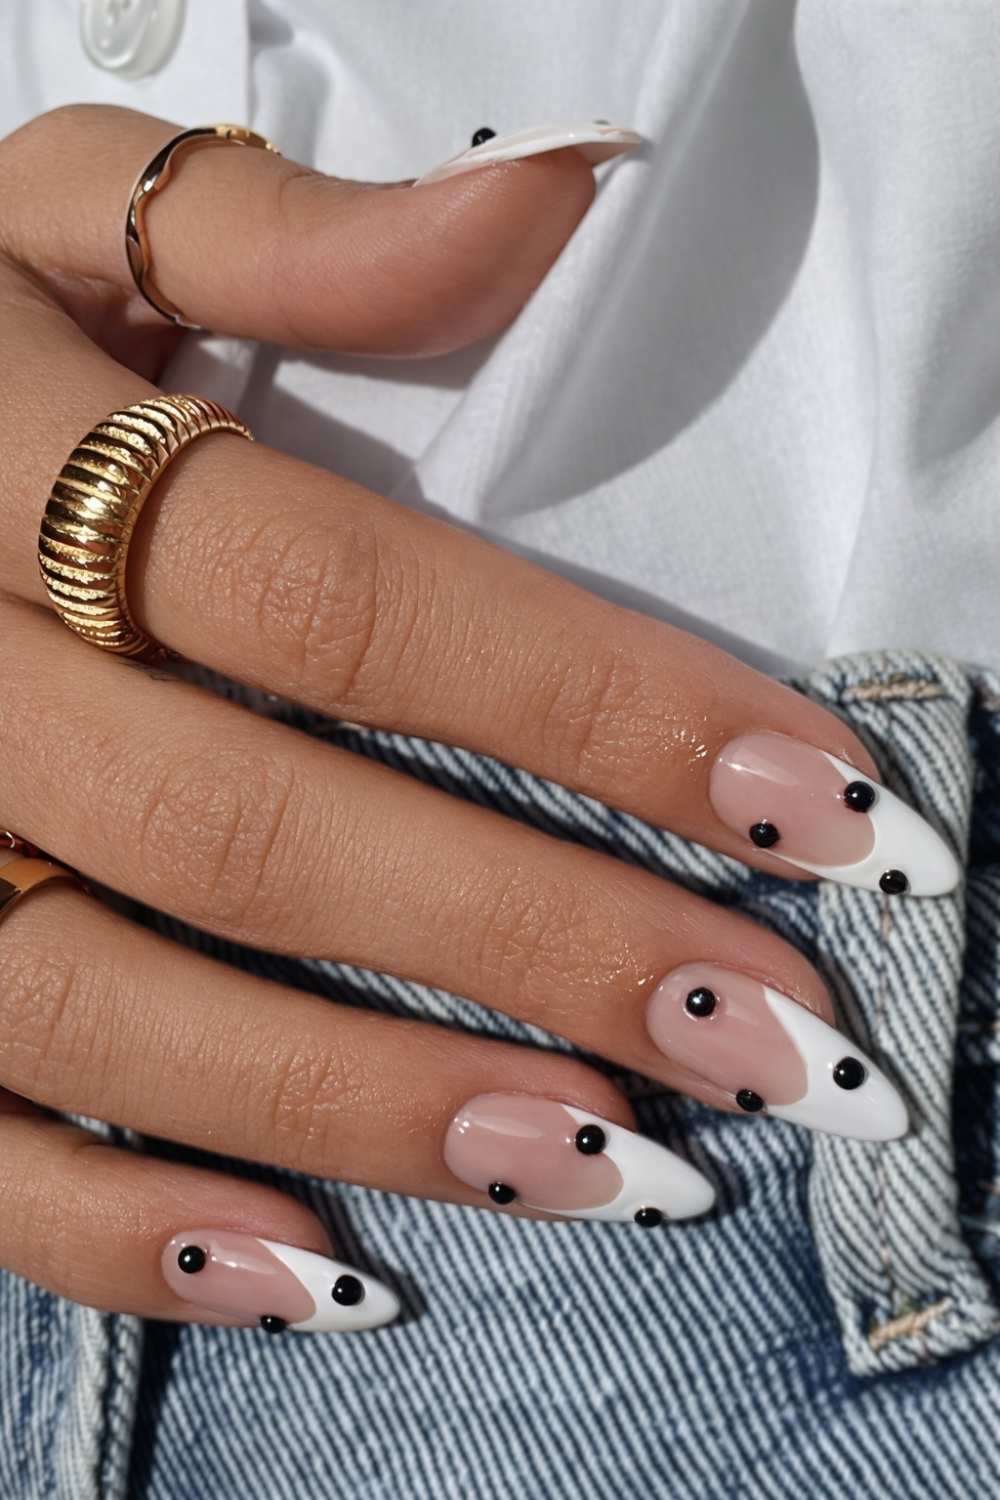
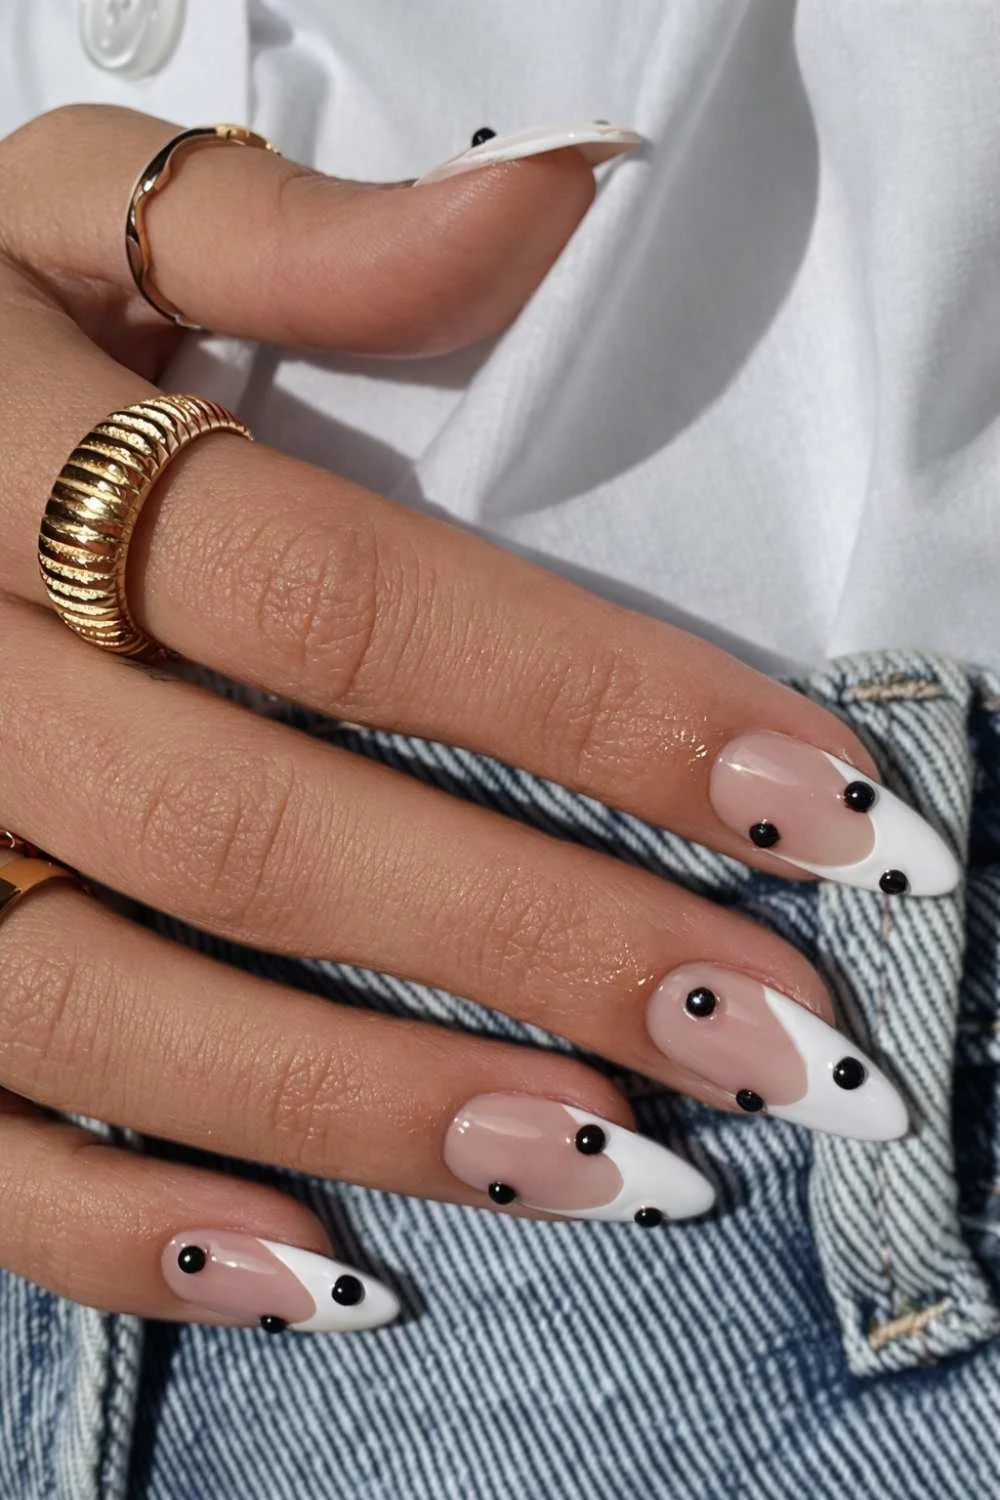
Mix-and-match sets are also everywhere. Different colors, different accents, different designs across your ten nails, all unified by stud accents scattered throughout.

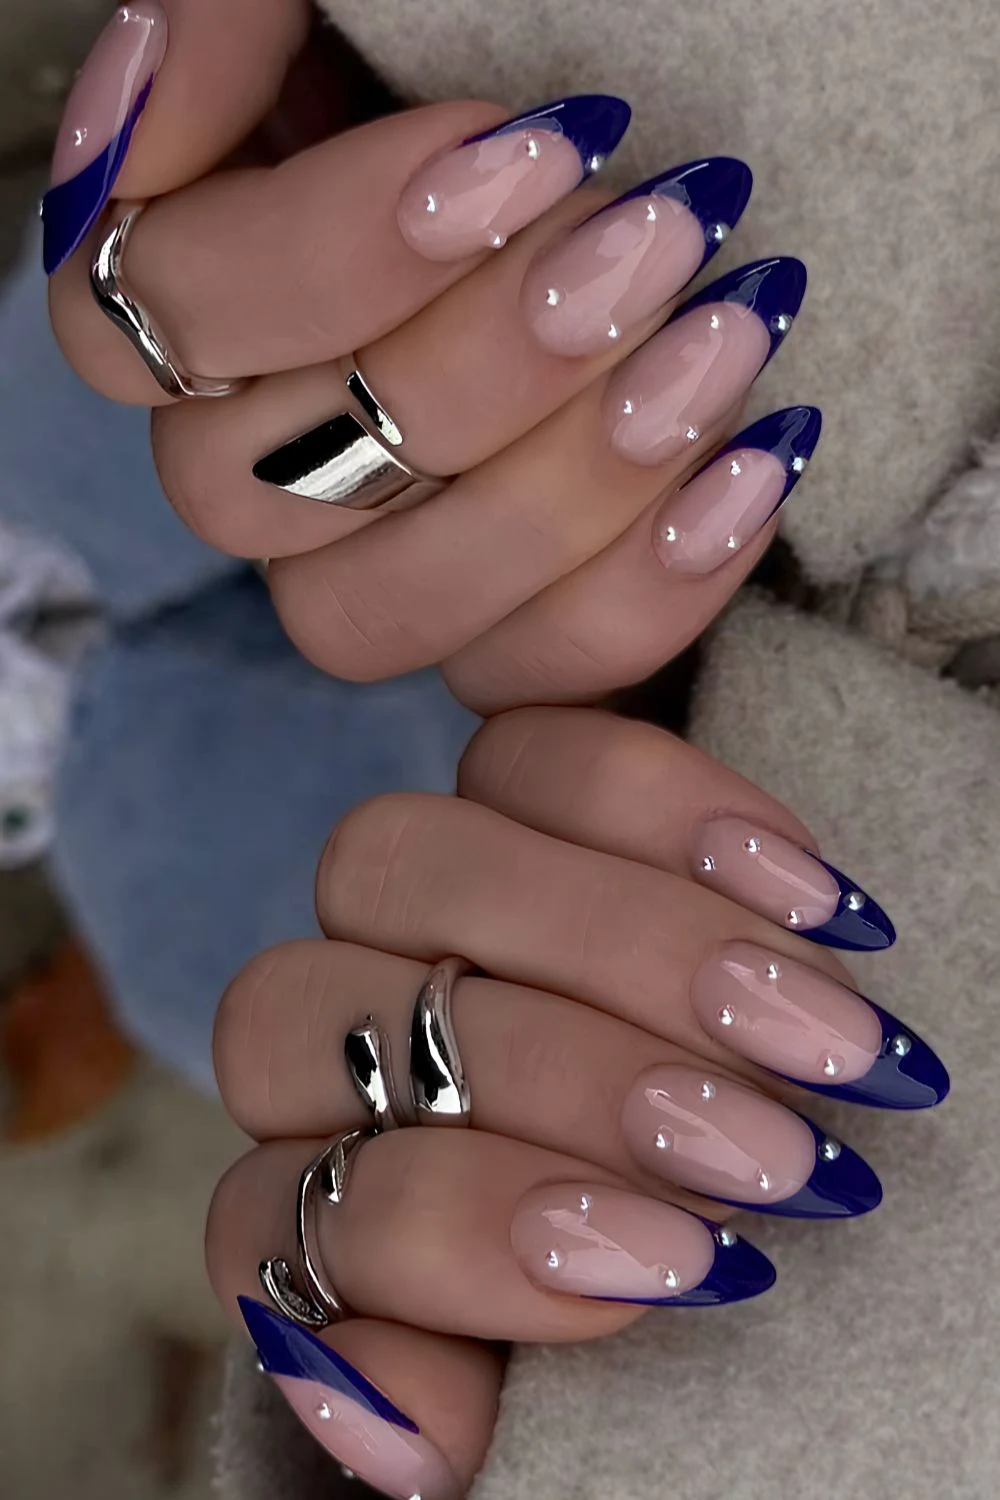
And honestly? Studs work on literally any French variation – classic smile lines, deep French, outlined tips, swirly smile lines, striped tips, ombre fades. They add texture, dimension and sparkle without requiring a degree in nail art.
Color combos and finishes


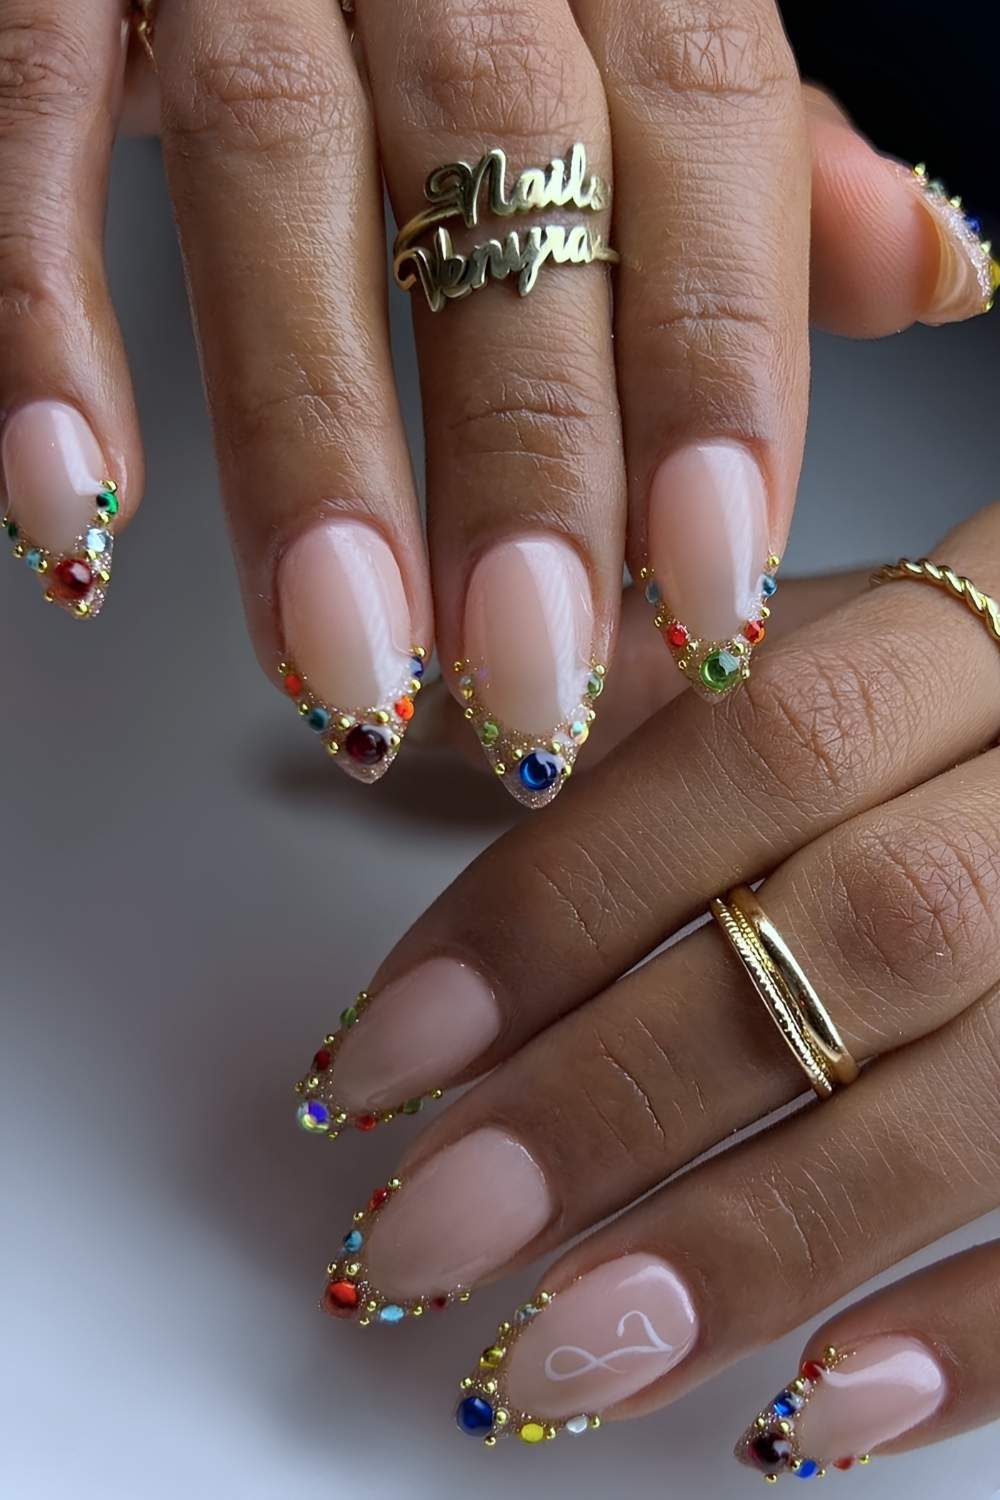
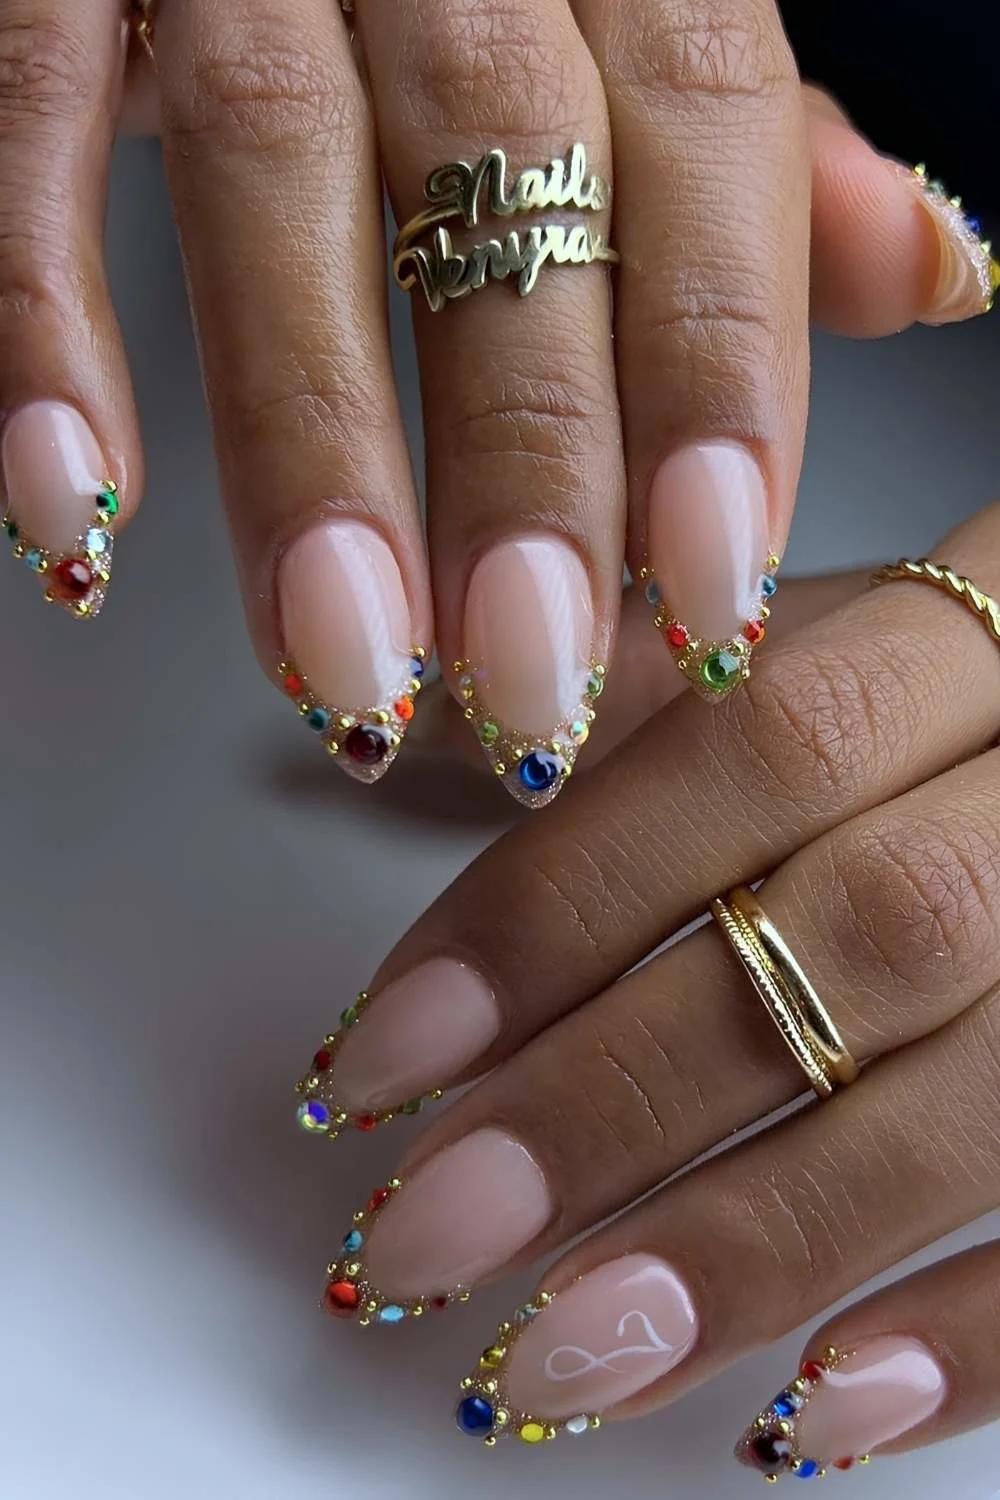
Clear crystals and micro pearls keep things bridal-elegant, while colored gems create that gemstone-encrusted jewelry vibe. There’s genuinely no wrong answer here.
White French tips with black microbeads? Yes. Sapphire blue frenchies with flatback pearls? Absolutely. Pink Frenchies with matching pink rhinestones? Go off.
You could also match rhinestones to your birthstone – red stones for ruby nails, emerald crystals for May babies, you get the idea. We actually have a full breakdown of birthstone manis if you want more inspo.
We’re also seeing bedazzled Frenchies combined with velvet, cat eye, glitter, and chrome finishes – because why stop at one type of sparkle source when you can have several.

How to DIY rhinestone French tips

Can you actually do this yourself? Honest answer: yes, if you have patience. I don’t. I book a salon appointment for this one because getting rhinestones to stay put is the whole battle, and I lose that battle every single time.

But if you’re built different, here’s how to make it happen:
1. First, decide on your design and get your crystals or studs (Amazon has everything). A wax pencil or rhinestone picker tool makes placement infinitely easier than tweezers – my nail tech says that Crystal Katana is the move if you want to invest.

2. Prep your nails by filing, shaping, and applying your base coat and colored polish as usual, curing between layers if you’re using gel. Then apply a small dot of adhesive (gel glue, nail glue, or even top coat) where you want the stones – work one nail at a time so the adhesive stays tacky.

3. Use your wax tool to pick up the flat side of a rhinestone and gently place it onto the adhesive, pressing lightly. Create your pattern – borders, clusters, lines, single accents, whatever you’re feeling. Cure if you’re using gel adhesive.
4. For sealing, here’s the important part: yes, you can put the top coat over rhinestones, but it dulls the sparkle and makes them look cloudy. Instead, apply the top coat around the gems to lock them in place while keeping their shine intact. Final cure if you’re using gel, then cuticle oil to finish.

Bottom line
Bedazzled French tips are perfect for NYE, holiday parties, birthdays, bridal manis, wedding guest duties, or literally any occasion worth celebrating. Or honestly, just because you love sparkle – that’s valid too.
Minimal or maximal, classic clear or wild colors, pearls or crystals or both, you really can’t mess this one up. Make it your own and enjoy people complimenting your hands for the next three weeks.